dadasd
10
2024.12
11 Essential Steps for Creating Life-Like Dental Restorations
As dental technicians, our work demands not only precision and skill but also an artistic touch. When creating restorations, especially for anterior restoration, replicating the color and texture of natural teeth is crucial to achieving a lifelike result.
In this article, we'll explore key factors for replicating natural teeth and provide effective methods and tips to help dental technicians create realistic, high-quality restorations.

1. Understanding Natural Tooth Structure
To replicate the appearance of natural teeth effectively, you must first understand their composition and characteristics. Natural teeth consist of several layers:
Enamel: The outermost layer, translucent and slightly bluish in hue.
Dentin: The underlying, slightly yellowish material that provides most of the tooth's color and opacity.
Pulp: Located at the center of the tooth, it influences the overall tone and translucency.
Surface Texture: Natural teeth have varied textures, from smooth to slightly rough, with fine micro-ridges and natural wearing.
When replicating these layers, it is important to consider how light interacts with each one, creating different color effects, reflections, and shadows.
2. Selecting the Right Materials
Choosing the right material is crucial for achieving a natural look in restorations. Modern dental ceramics offer materials that closely mimic natural teeth:
Porcelain: Offers excellent translucency, great material for aesthetic restorations that replicate enamel's light-scattering properties.
Zirconia: Strong and durable, with newer versions offering better translucency for posterior restorations.
Besmile's 3D Zirconia has the brand new Bionic 3D Multilayer Gradient Technology, could achieve a natural, seemless transition like a natural teeth. Meanwhile, it could deliver consistent results at a sintering range of 1520℃ to 1560℃, give you freedom and reliable outcome everytime.
Composites: Often used for fillings, but also suitable for veneers or crowns, composites can be customized in color and layered to mimic both dentin and enamel.
Hybrid Ceramics: A combination of ceramic and resin, these materials offer great aesthetics, strength, wear resistance, and ease of handling.
The right material depends on the location of the restoration (anterior or posterior), the patient’s needs, and the desired aesthetic outcome.
3. Staining Process
(1) Moisten the Surface
Begin by applying Artamic Blending Liquid/Glaze to moisten the surface of the restoration. This helps prepare the restoration for staining, allowing the pigments to adhere properly.
Color used: Artamic Blending Liquid/Glaze
Pro Tips: Avoid brushing too much during this step, as over-brushing can disturb the staining process and result in uneven color application. Applying the coating too thickly on lateral sides of the tooth will also lead to a tighter fit after sintering. |
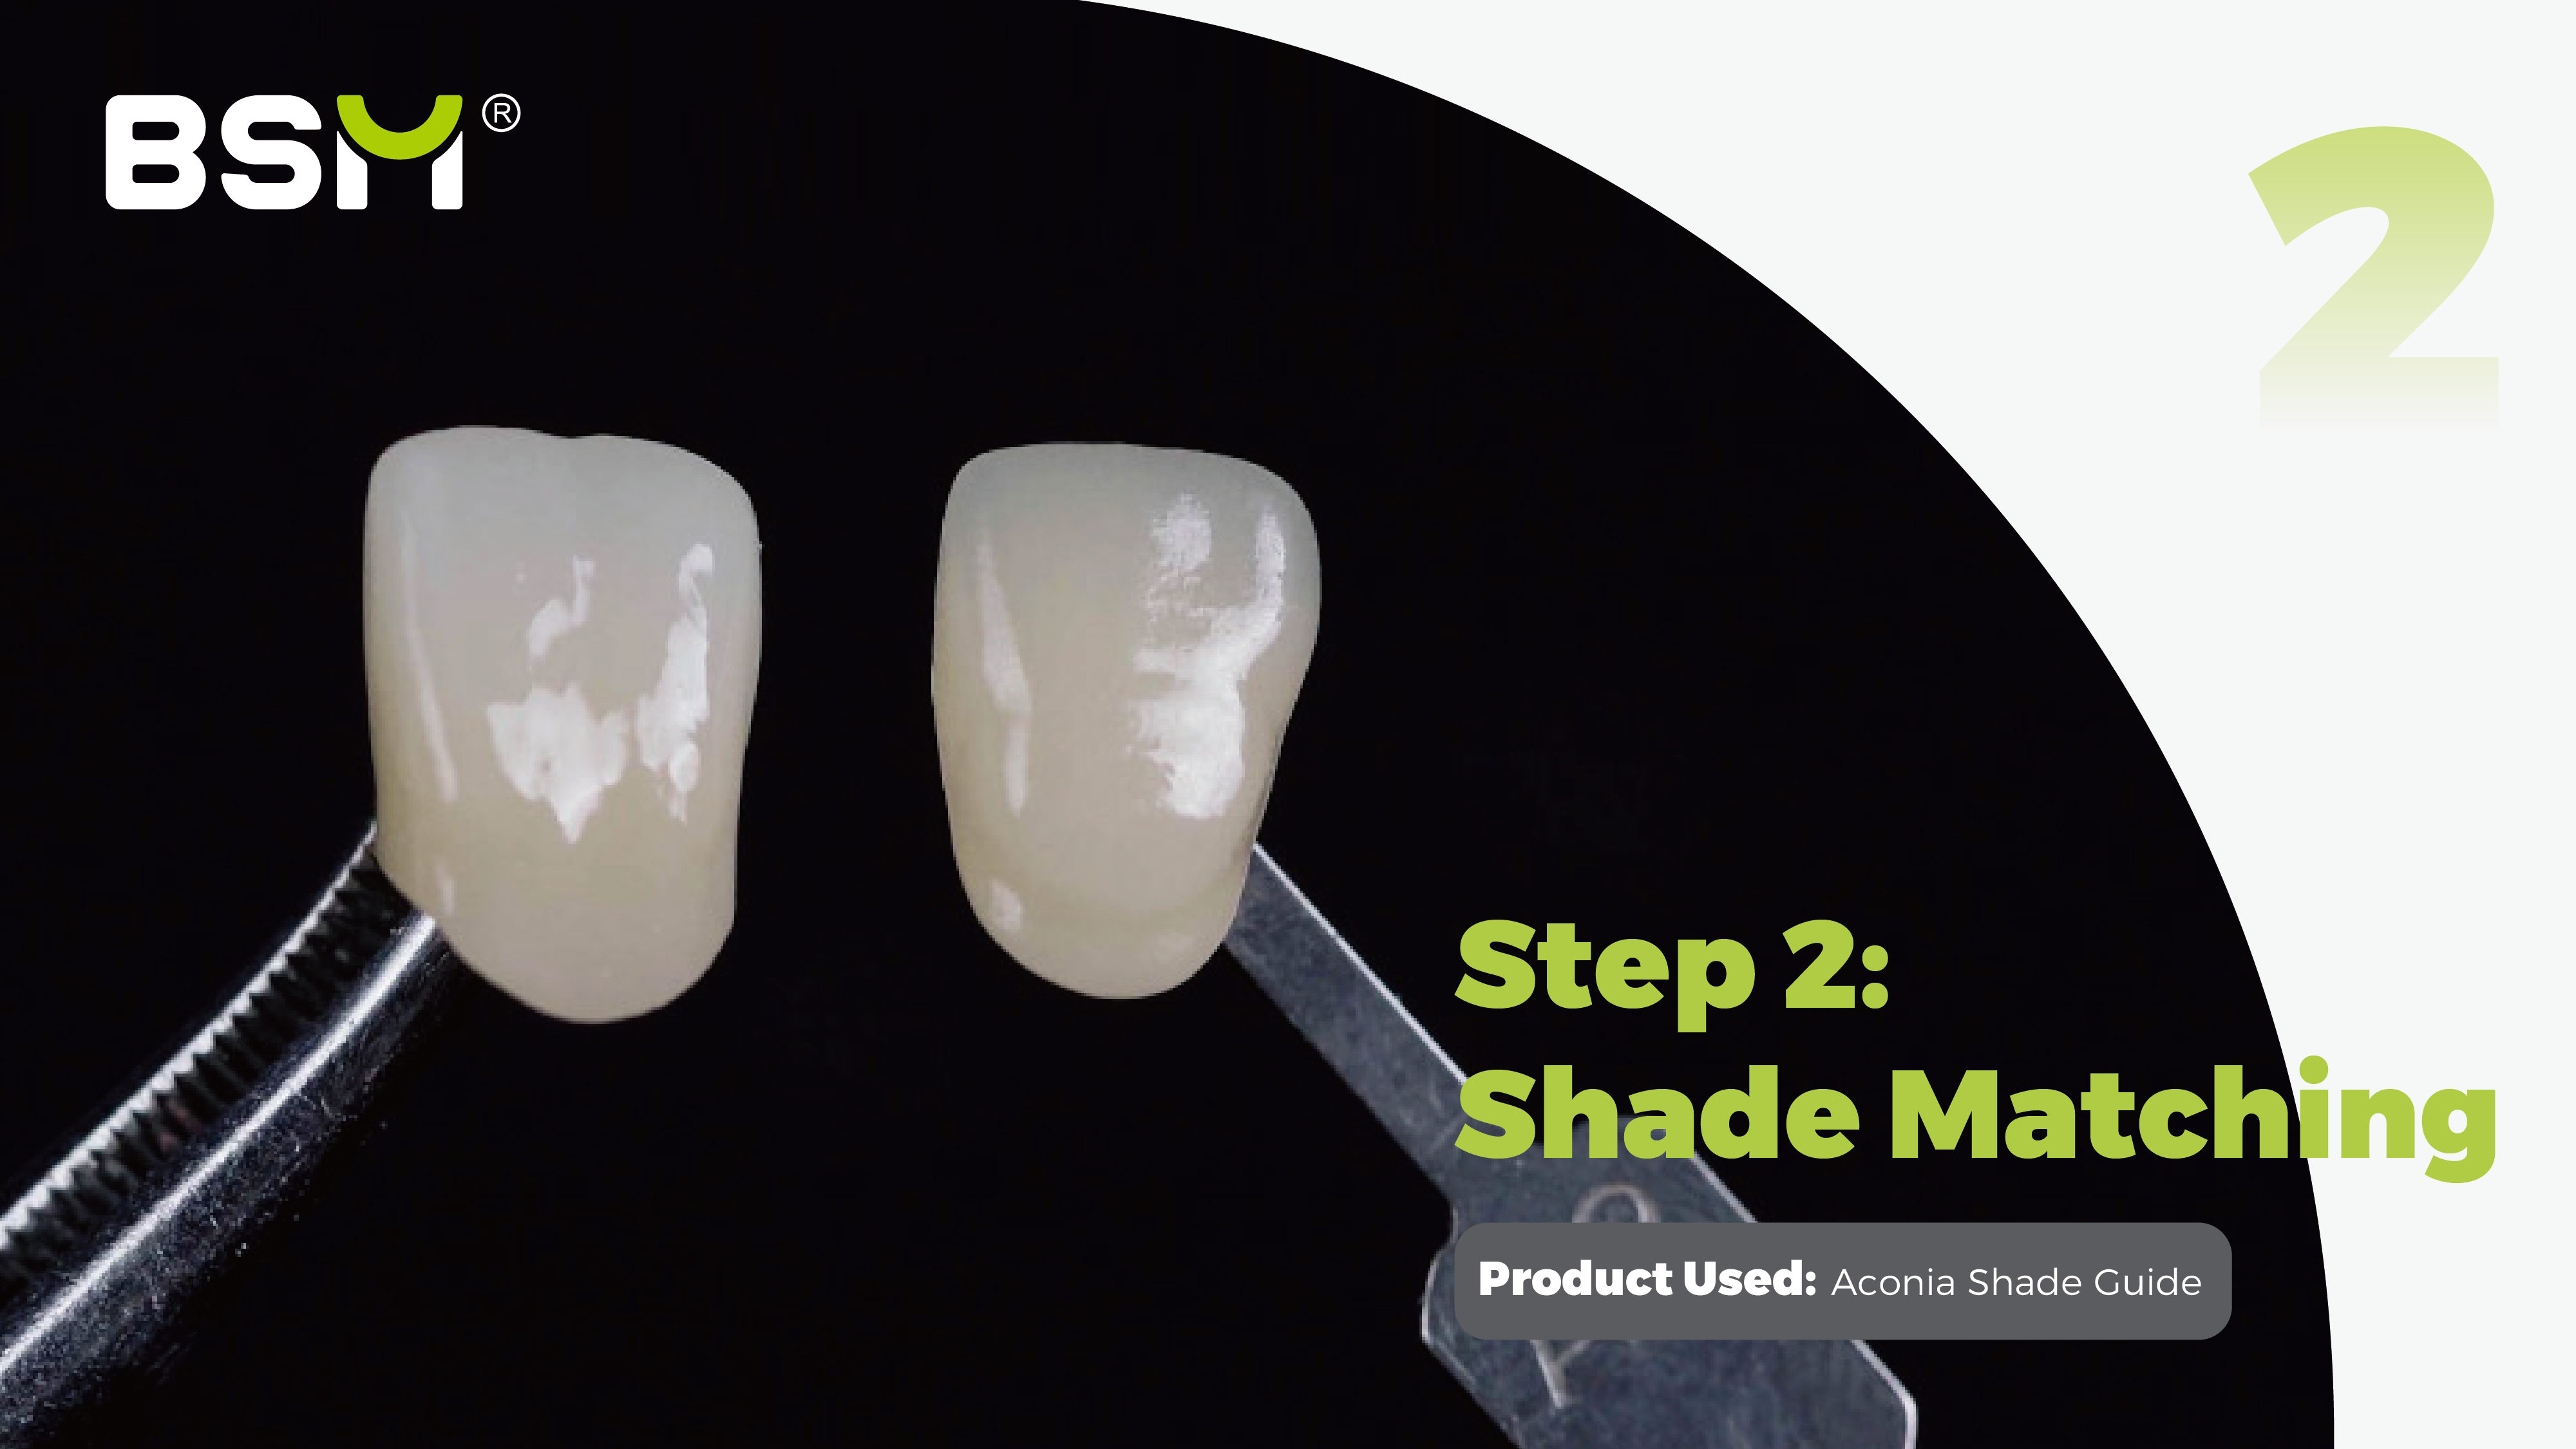
(2) Shade Matching
Use the Aconia Shade Guide to match the shade of the restoration to the patient's natural teeth.
This step is crucial to determine if additional dentine shades need to be applied across the restoration to ensure a seamless blend with the patient's smile.
Product Used: Aconia Shade Guide, dentine shades
Pro Tips: Dentin shades can only enhance the chroma, for example, from A1 to A2. Therefore, it would be better to apply dentin shades when the crown color is a bit lighter than expected. |
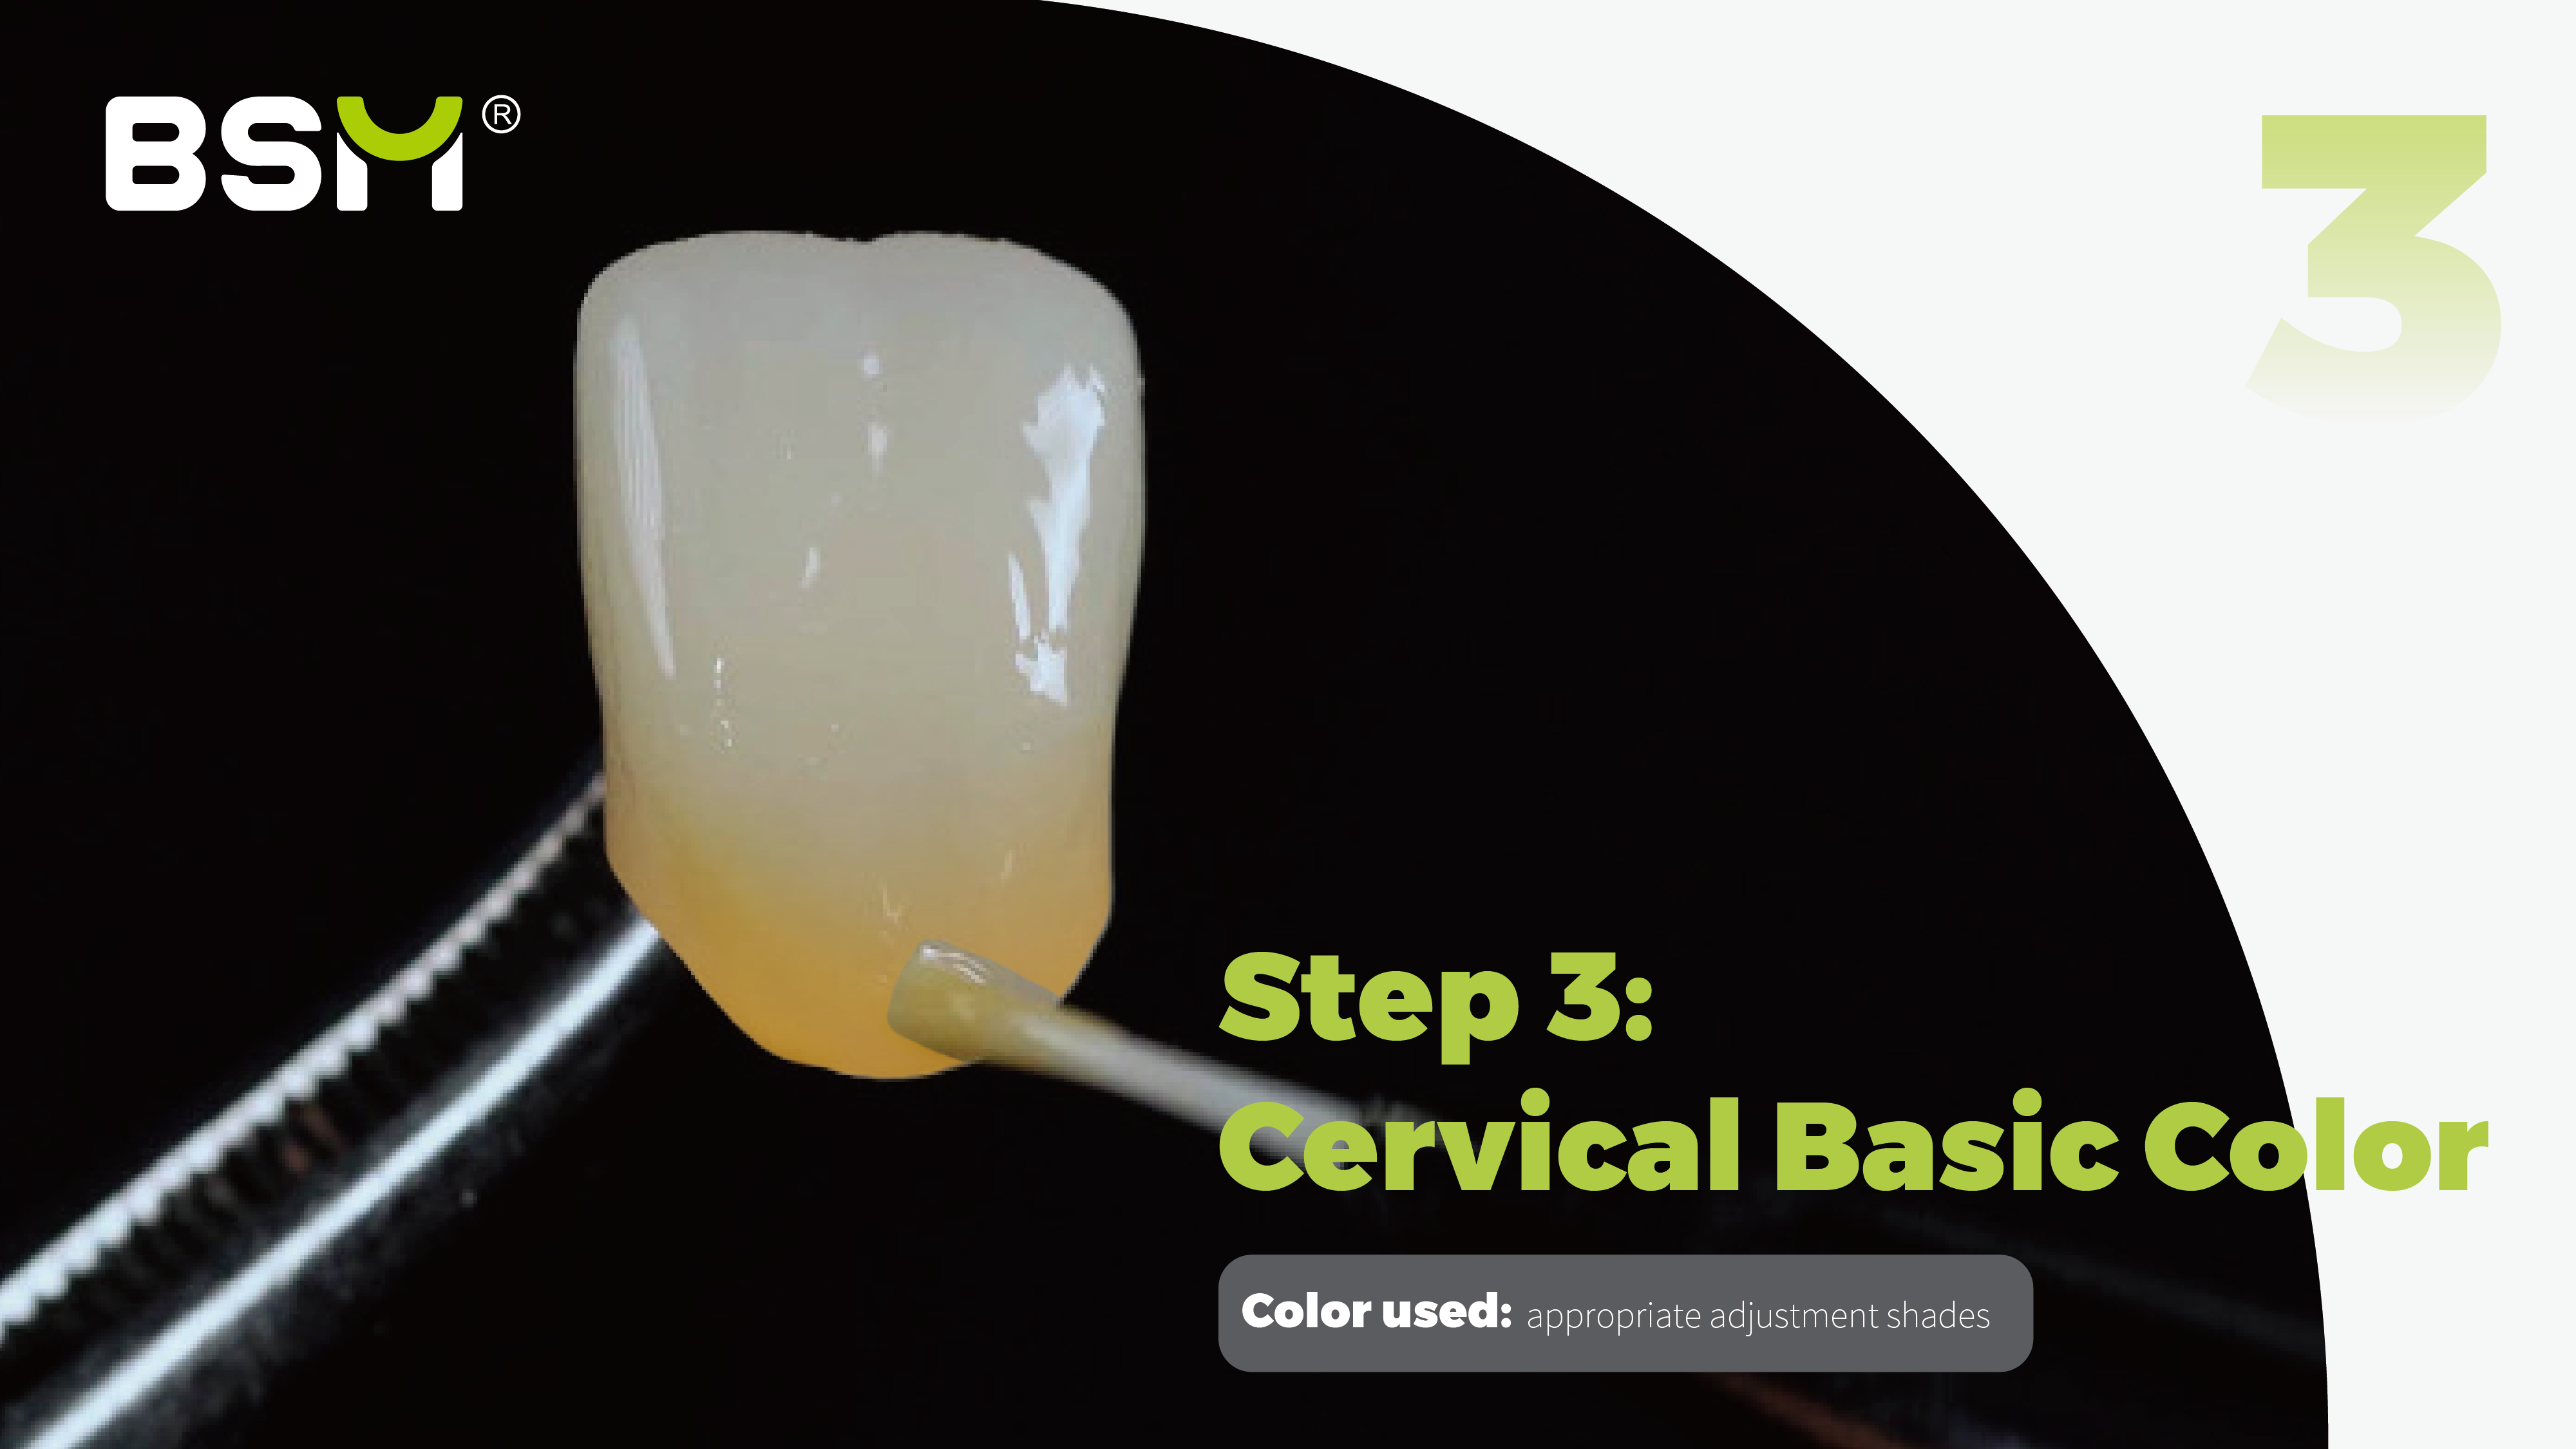
(3) Cervical Basic Color
Next, apply the appropriate adjustment shades to the 1/3 cervical area of the restoration. This step helps to enhance the color near the gum line, creating a natural gradient from the root to the crown of the tooth.
Color used: Adjustment shades (depends)
Pro Tips:The color at the cervical region of the tooth will be darker, and the color at the incisal third is rather light.The gradient effect from the cervical region to the incisal part can be created by varying the thickness of the coating. |
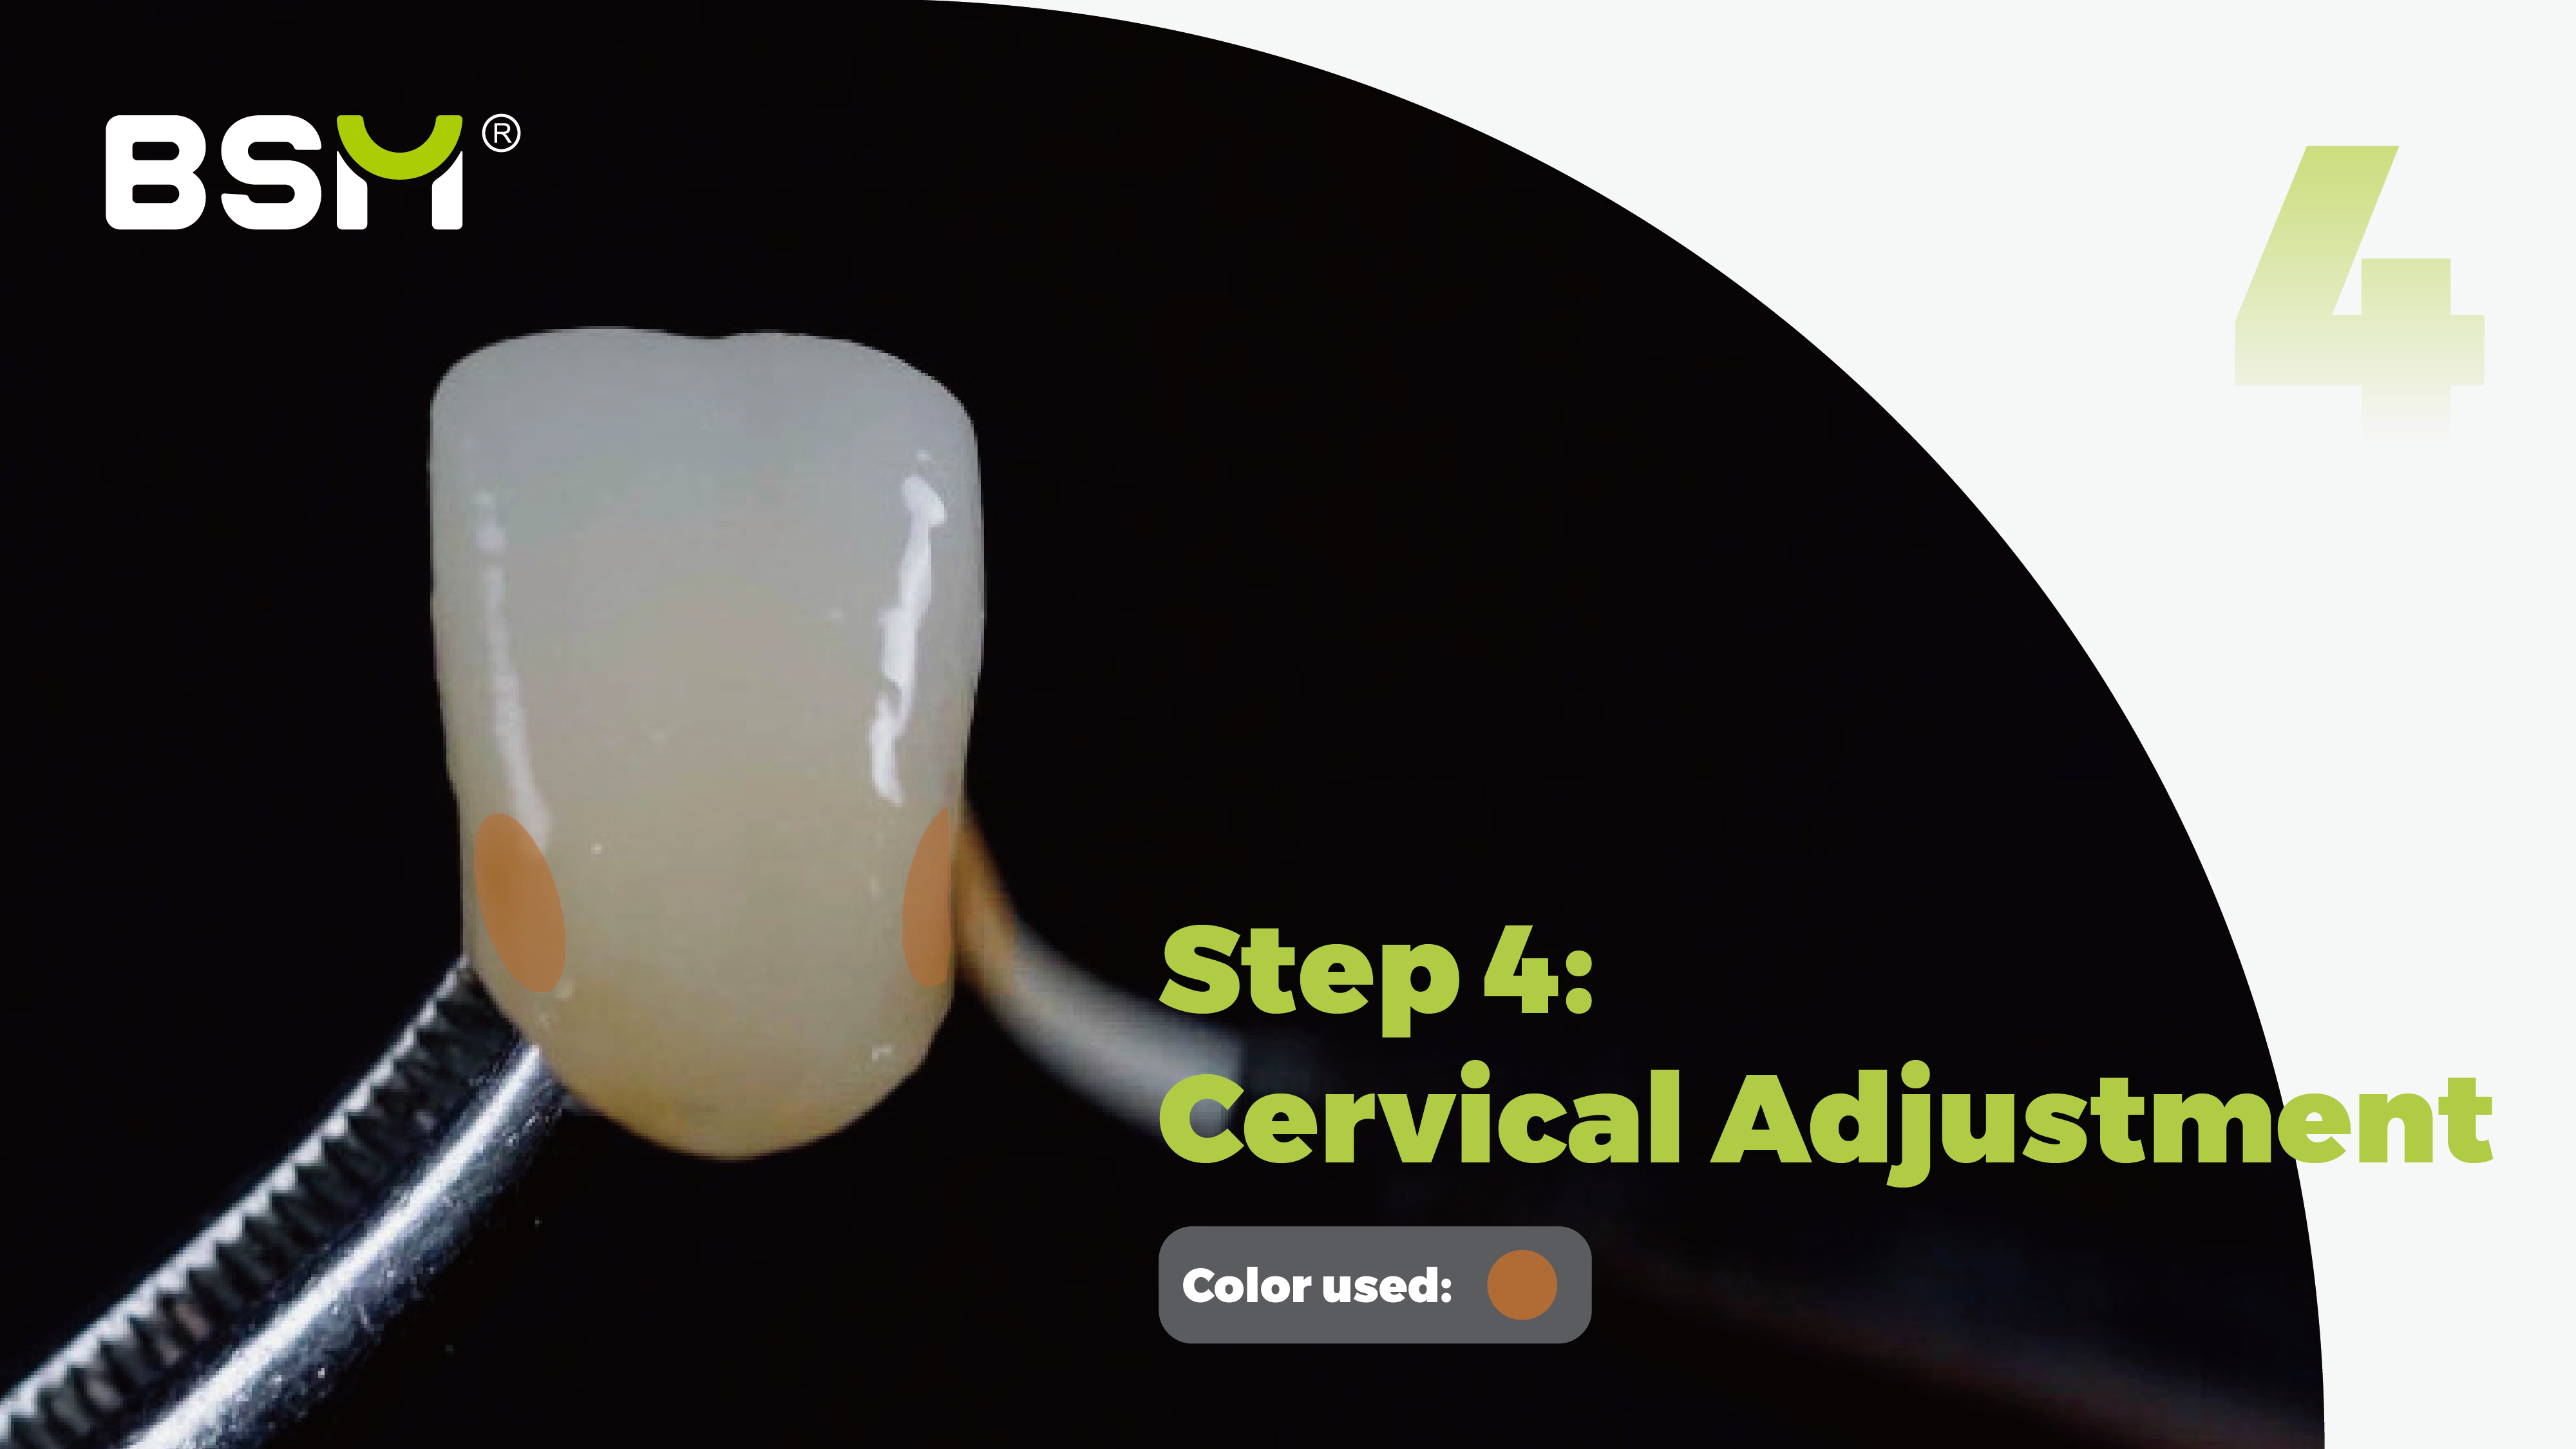
(4) Cervical Adjustment
For a more detailed, realistic result, use the Terracotta adjustment shade to add subtle characterization to the wide areas of the restoration. This shade will add depth and realism to the cervical region, mimicking natural color variations found in the base of a tooth.
Color Used: Terracotta
Pro Tips: By creating a darker color effect on the sides, the visual appearance of the tooth can be made narrower, which is suitable for a crown with a relatively wide cervical part. |
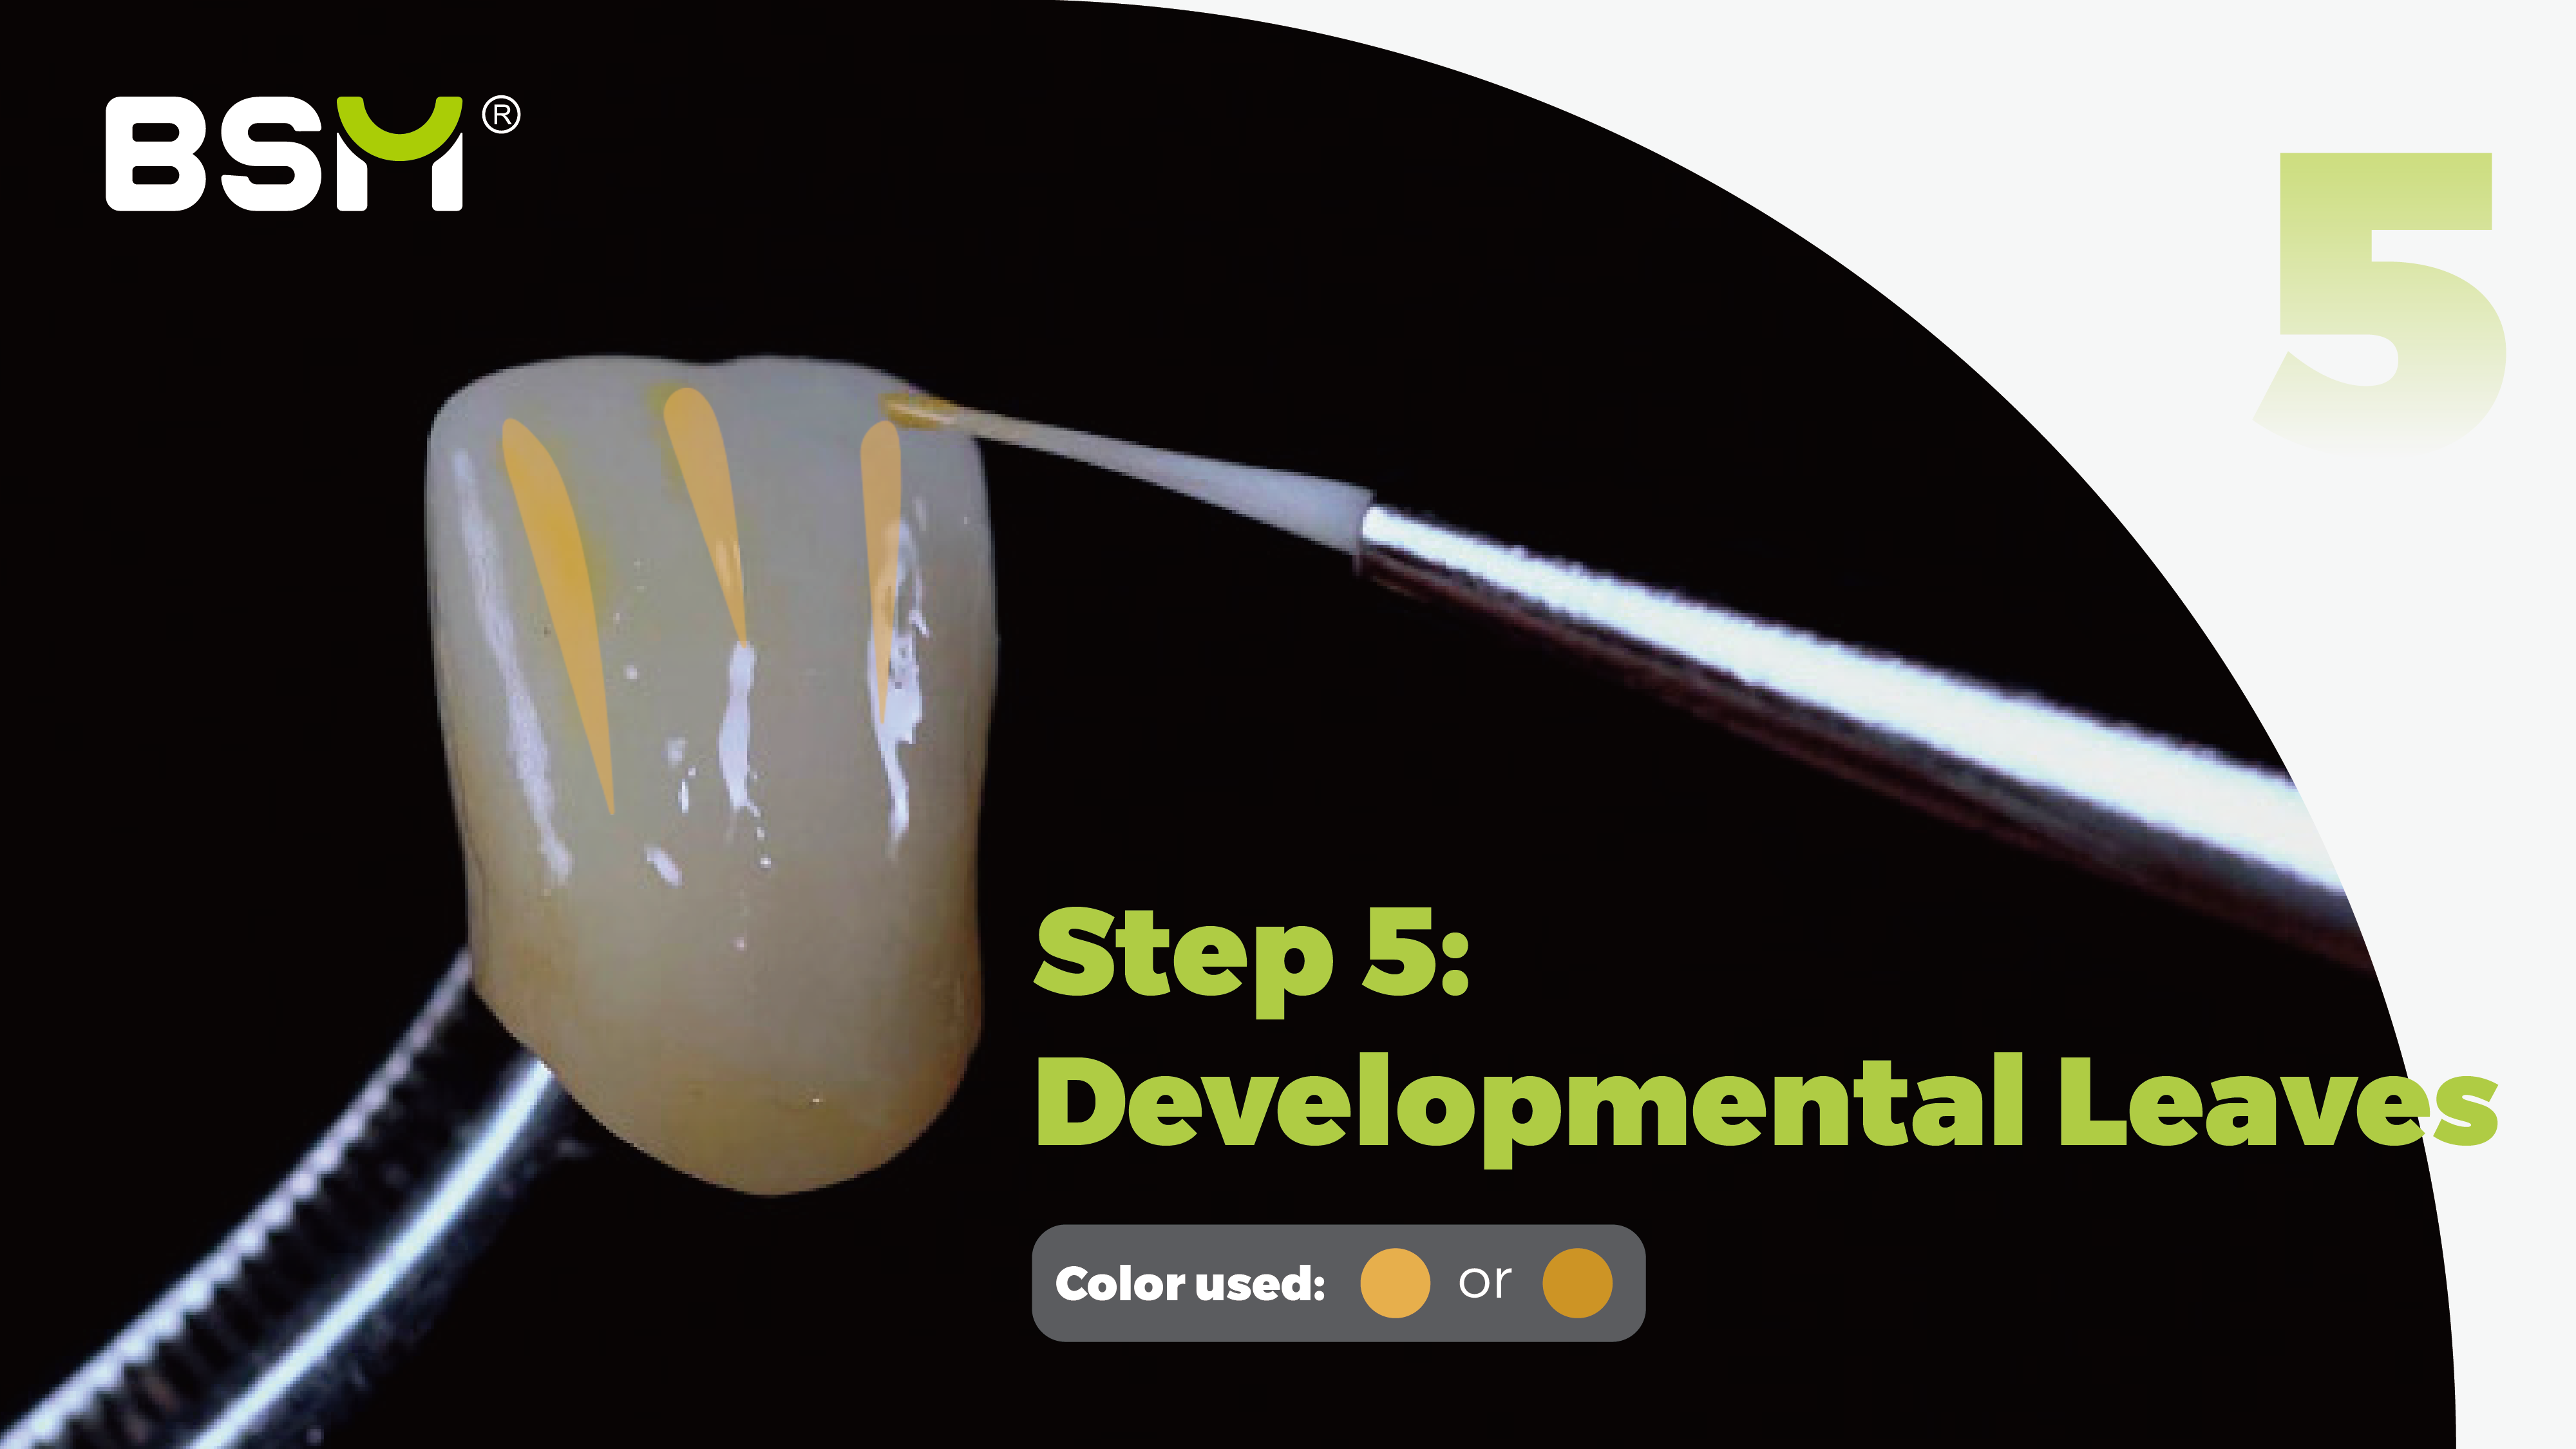
(5) Developmental Leaves
Select orange or yellow adjustment shades to stain the developmental leaves on the occlusal surface of the anterior teeth.
The developmental leaves mimic the slight grooves and indentations that naturally occur on the occlusal surface, enhancing the restoration's natural appearance.
Color Used: Orange/Yellow
Pro Tips: The developmental Leaves of the central incisors are like three fingers, and there is a concave developmental groove in the middle of the developmental Leaves. |
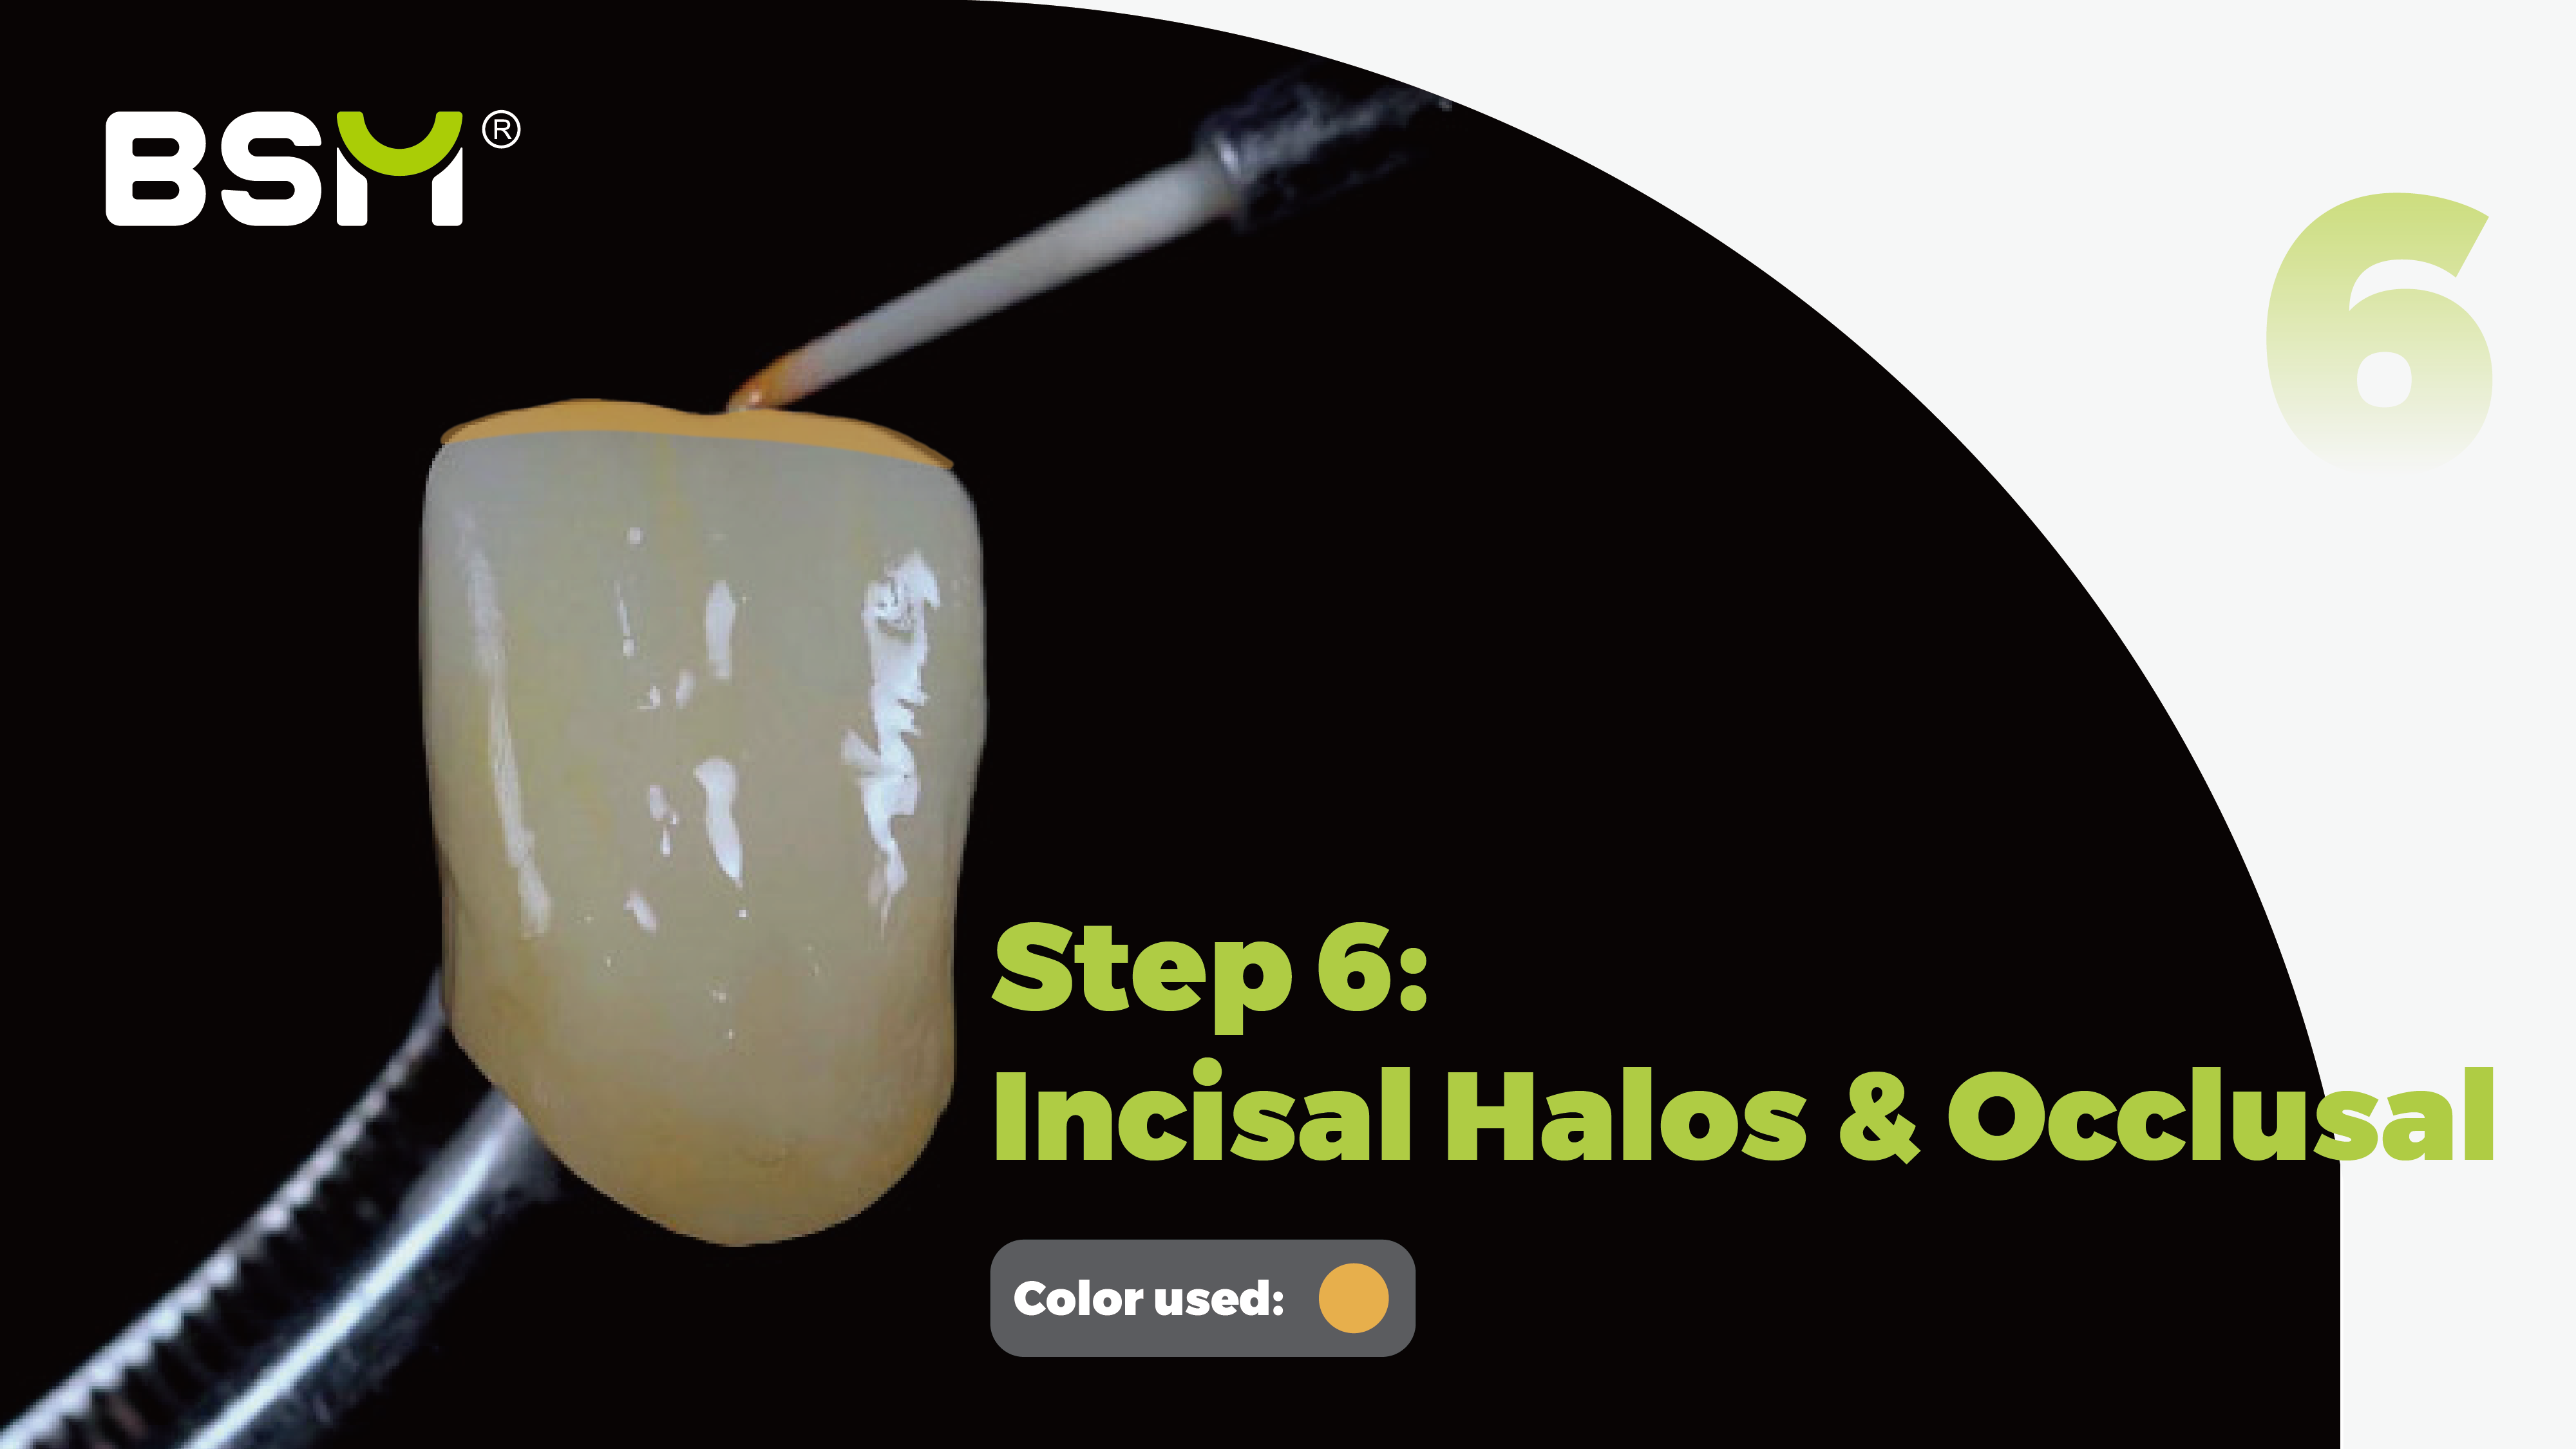
(6) Incisal Halos & Occlusal
Use the orange adjustment shade to stain the incisal halos and the wearing points on the occlusal surface.
These areas, particularly the incisal edge, exhibit a translucent effect in natural teeth, which can be replicated by applying the appropriate shade to these areas.
Color Used: Orange
Pro Tips: The color is relatively light, so don't apply too much. |
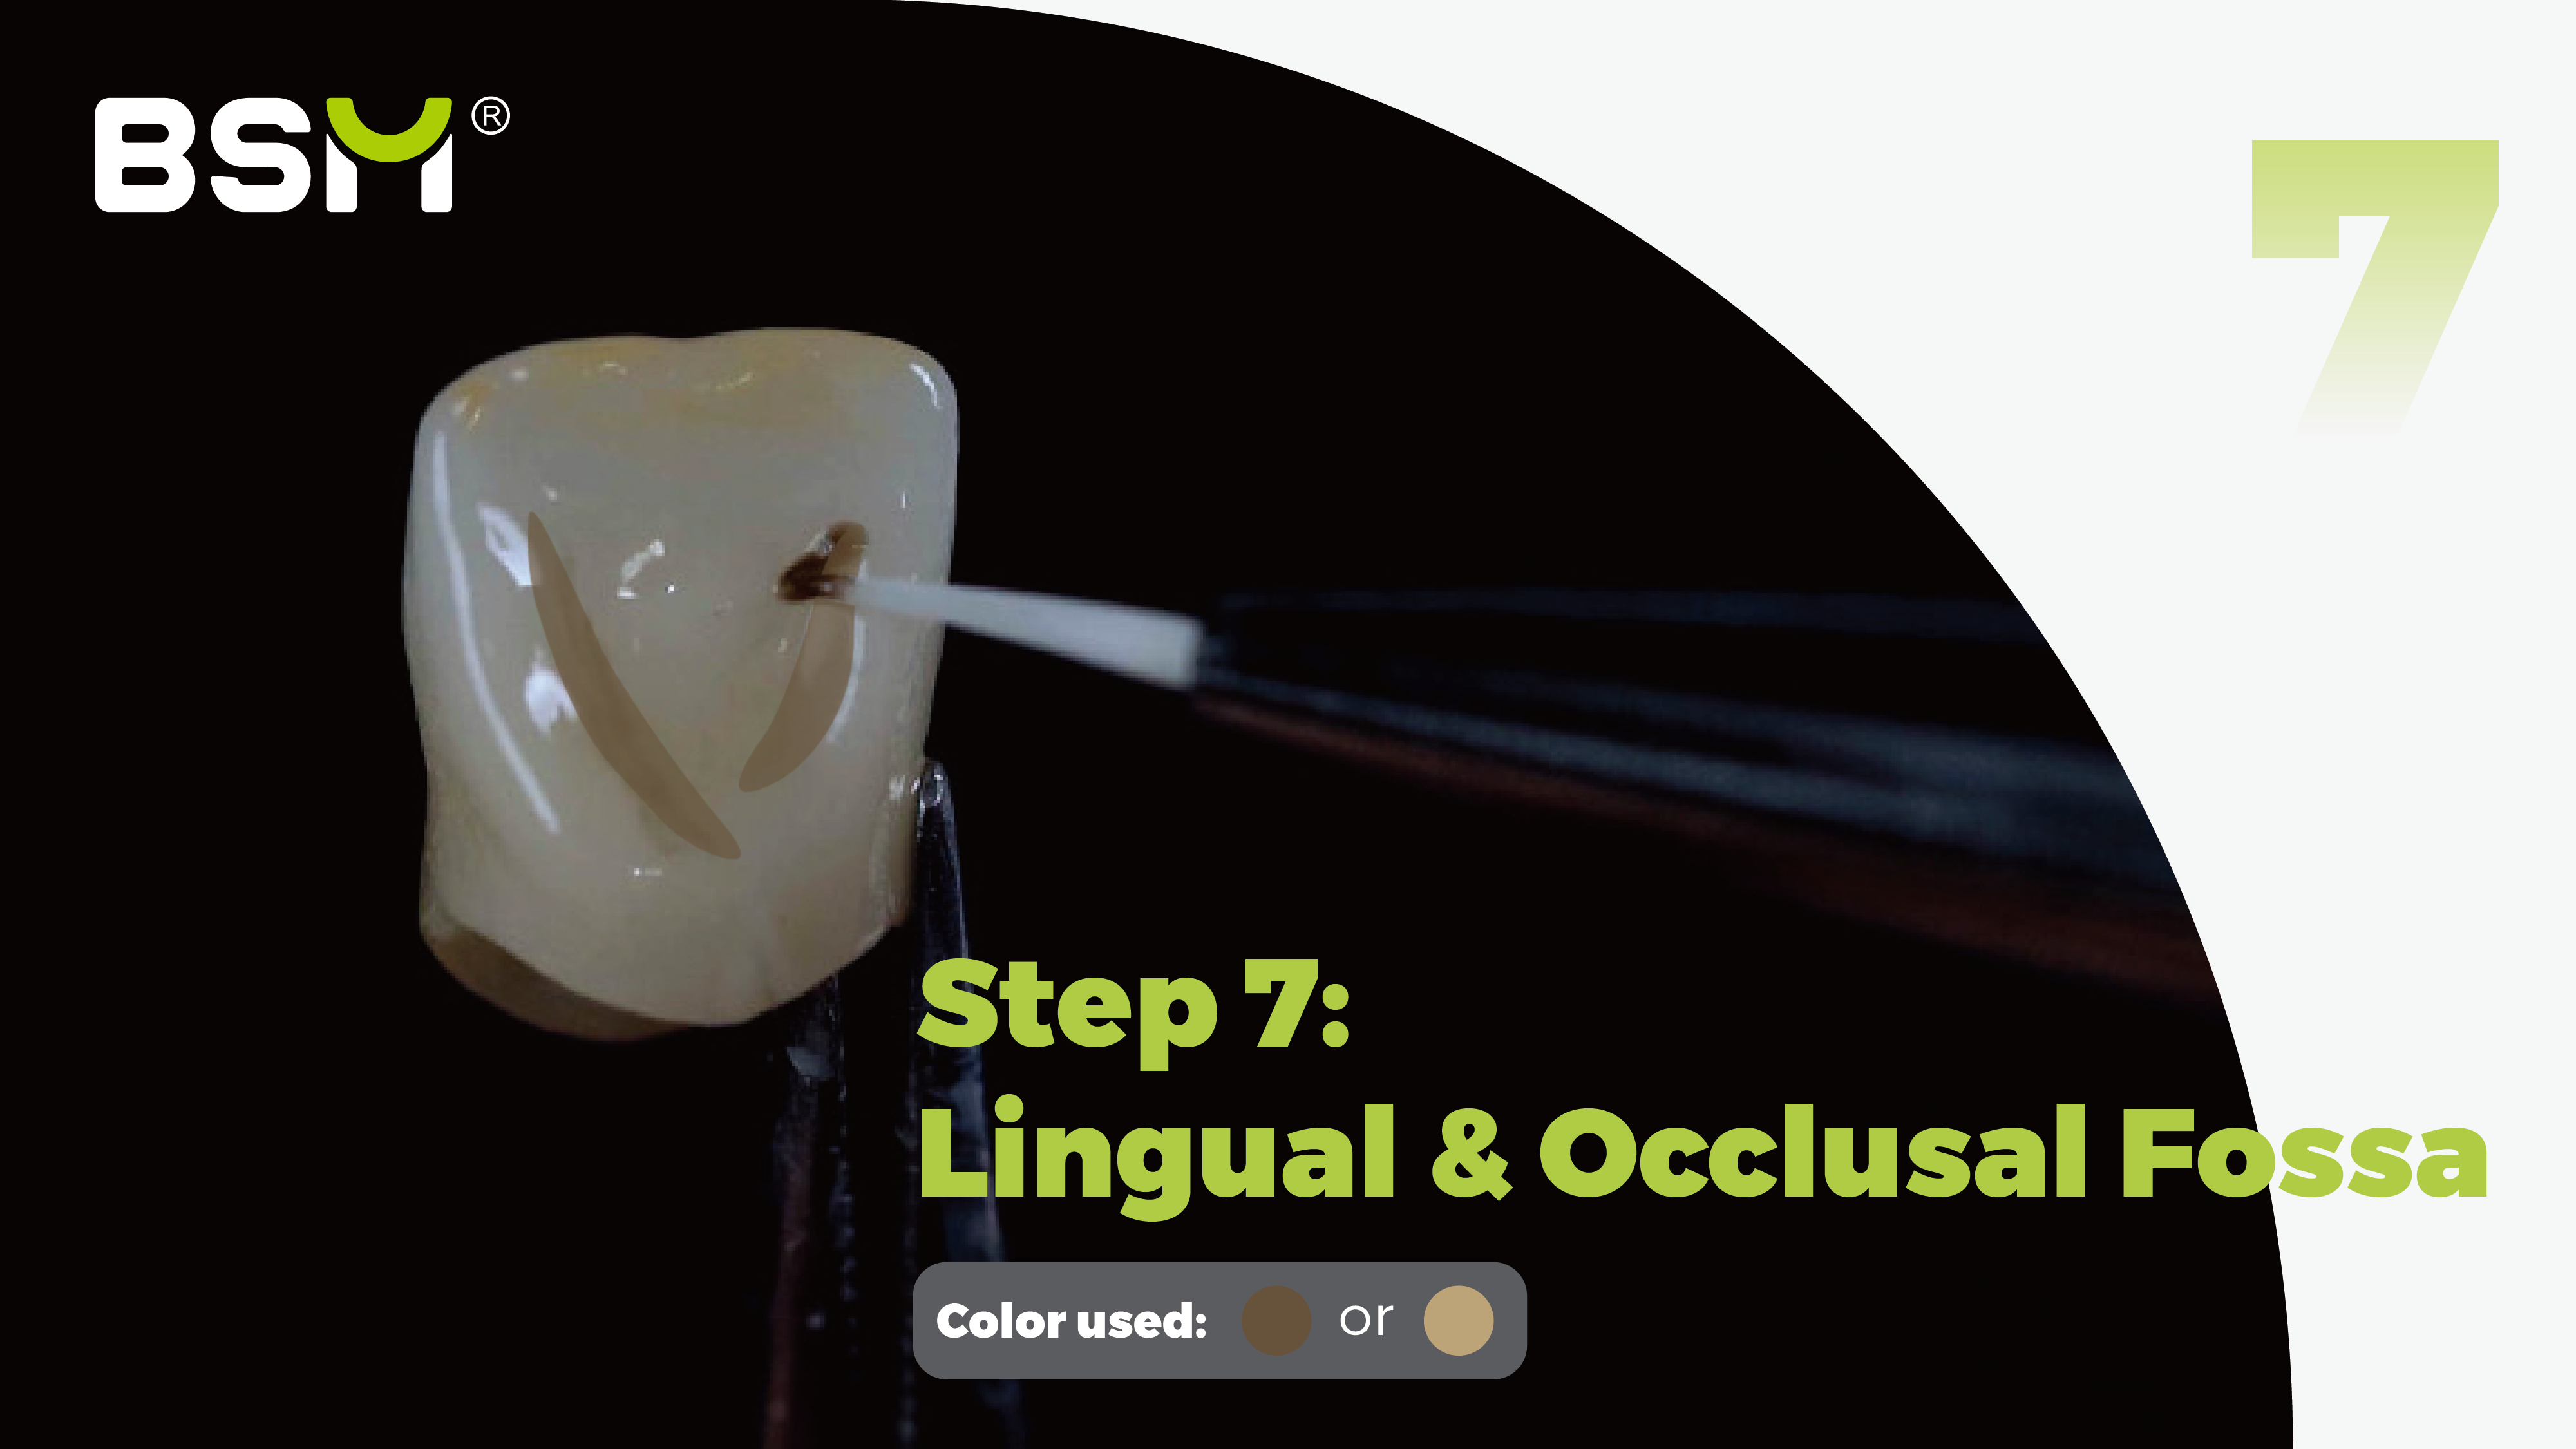
(7) Lingual & Occlusal Fossa
Pick brown or light brown adjustment shades to stain the lingual fossa of the anterior teeth and the occlusal fossa and grooves of the posterior teeth. These areas naturally exhibit more depth and variation in color due to wear and the structure of the tooth.
Color Used: Brown/Light brown
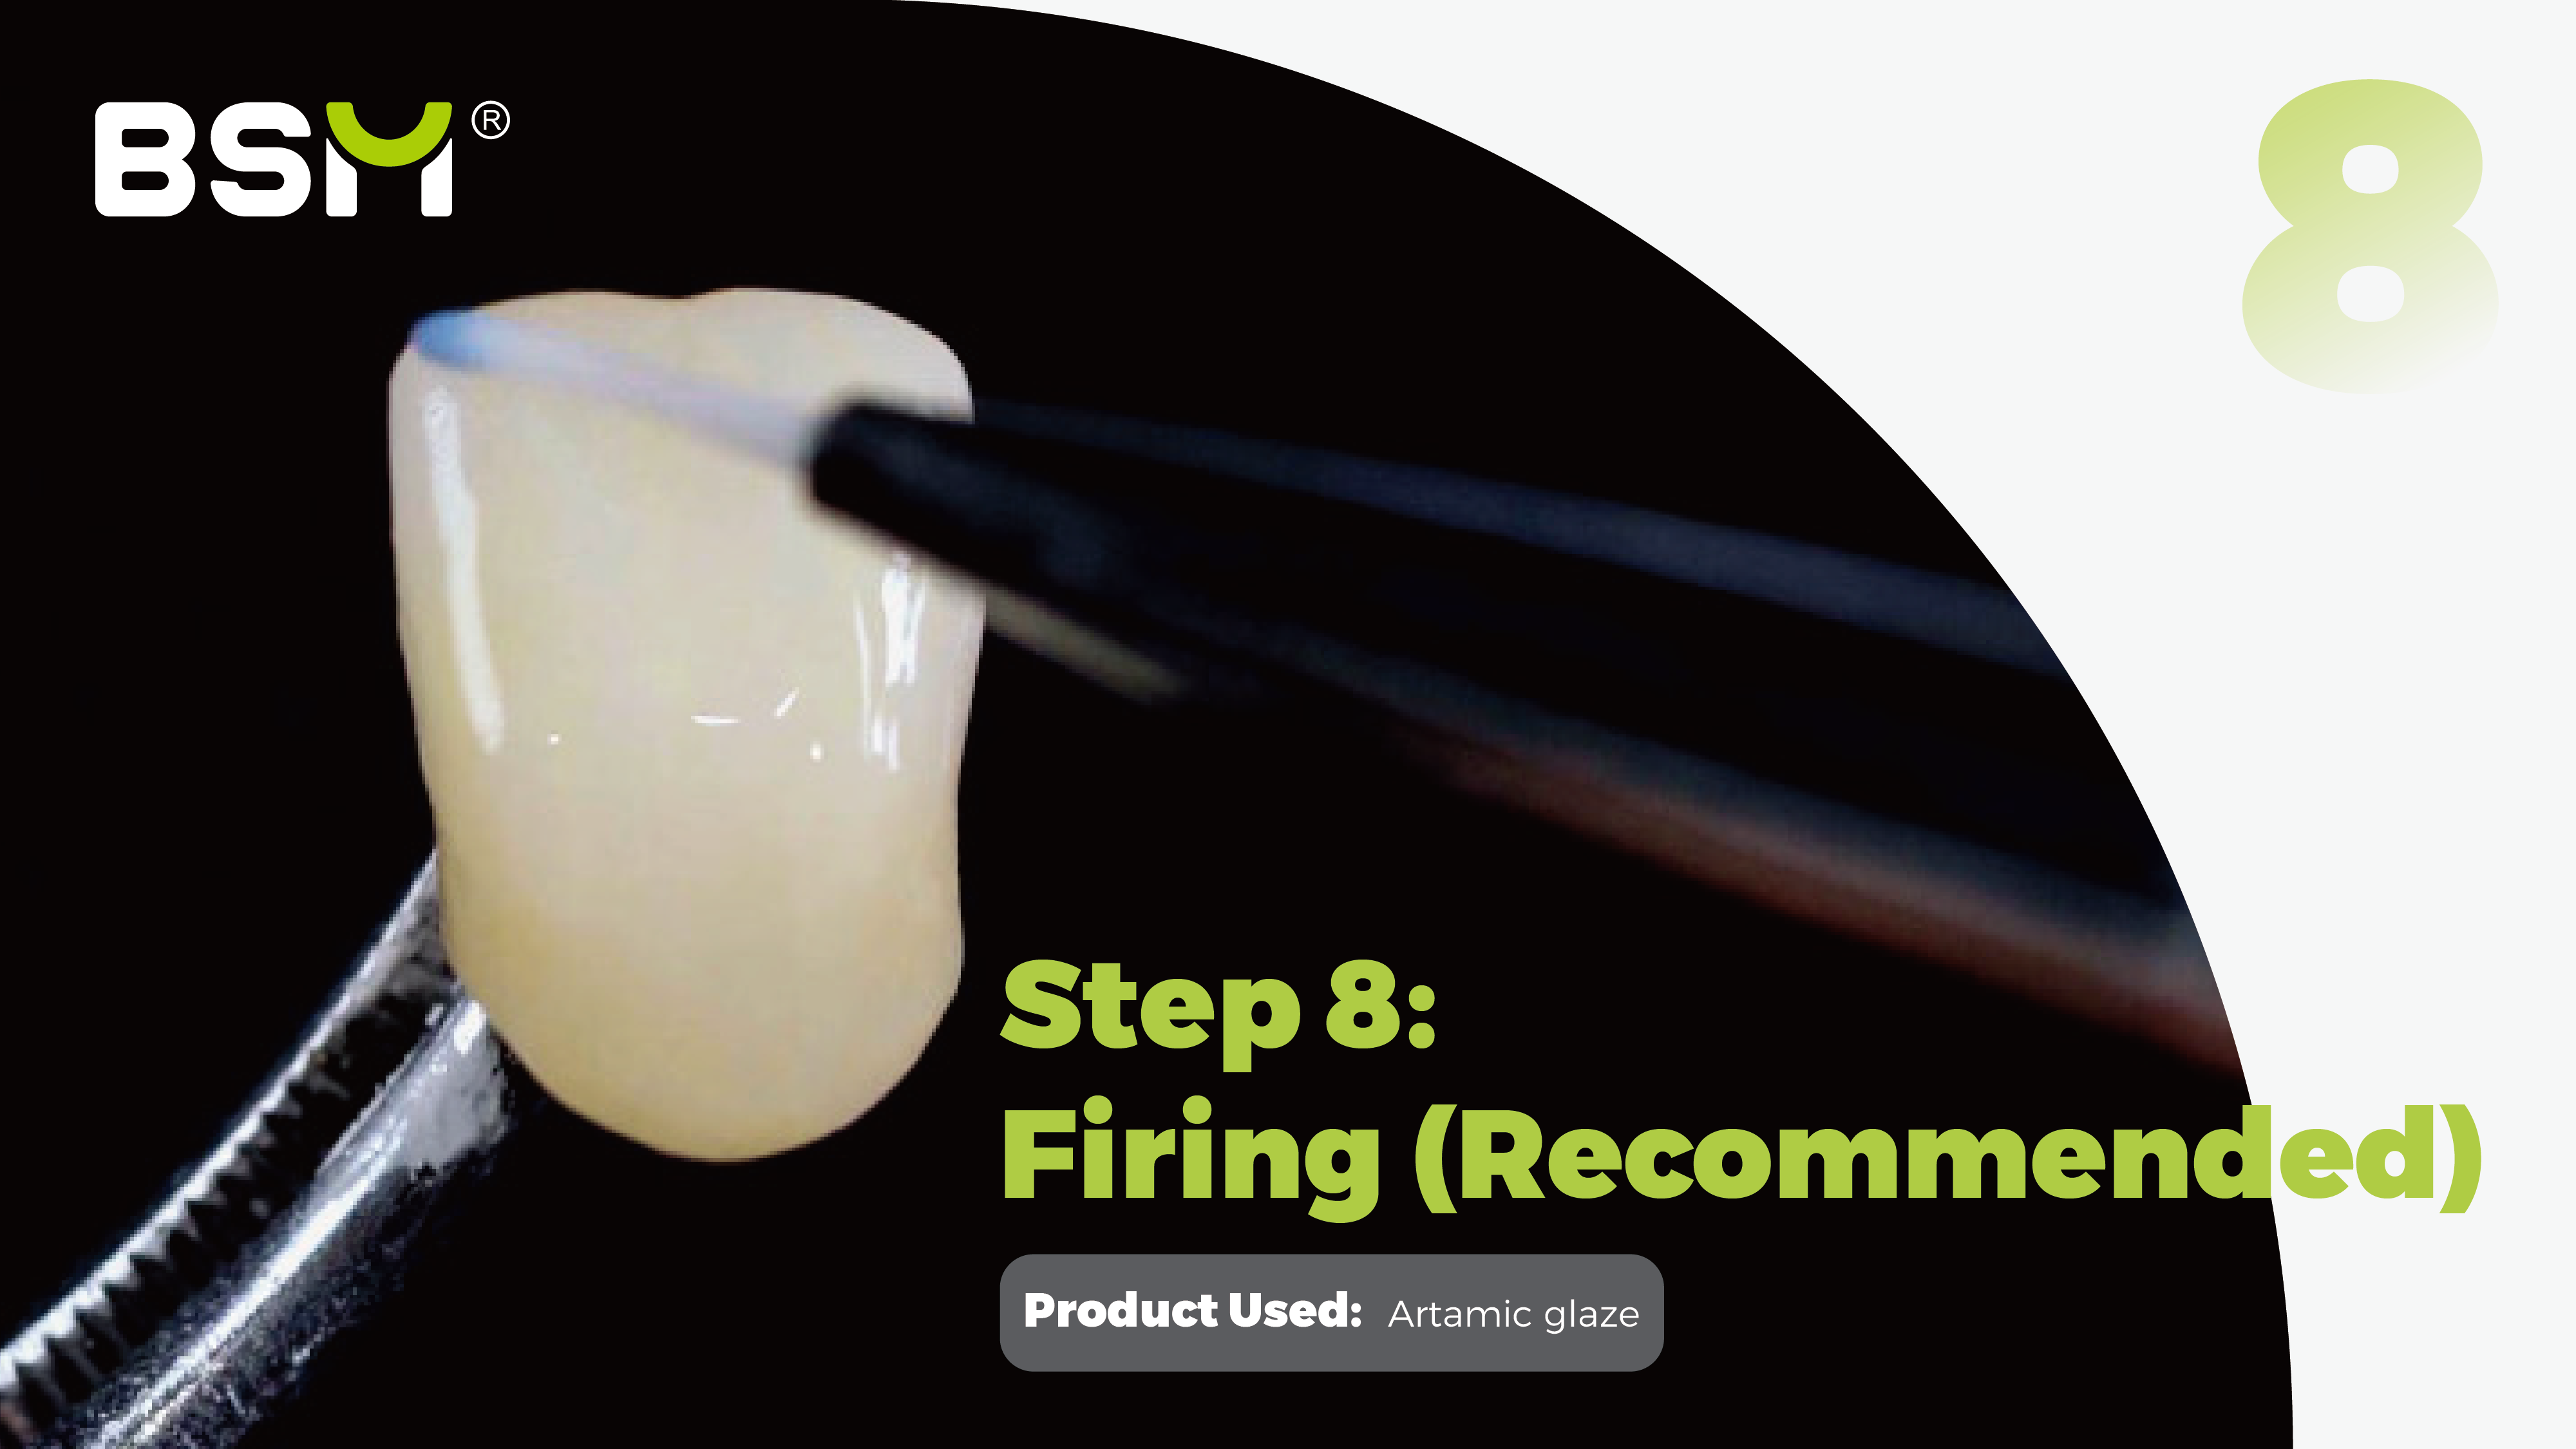
(8)Firing (Recommended)
After completing the staining steps, bake the restoration according to the material's recommended firing cycle. Once cooled, apply a layer of Artamic glaze to enhance the restoration’s translucency and glossy finish.
Product Used: Artamic glaze
Pro Tips: Select a deep or light color according to the requirements of the actual case. |
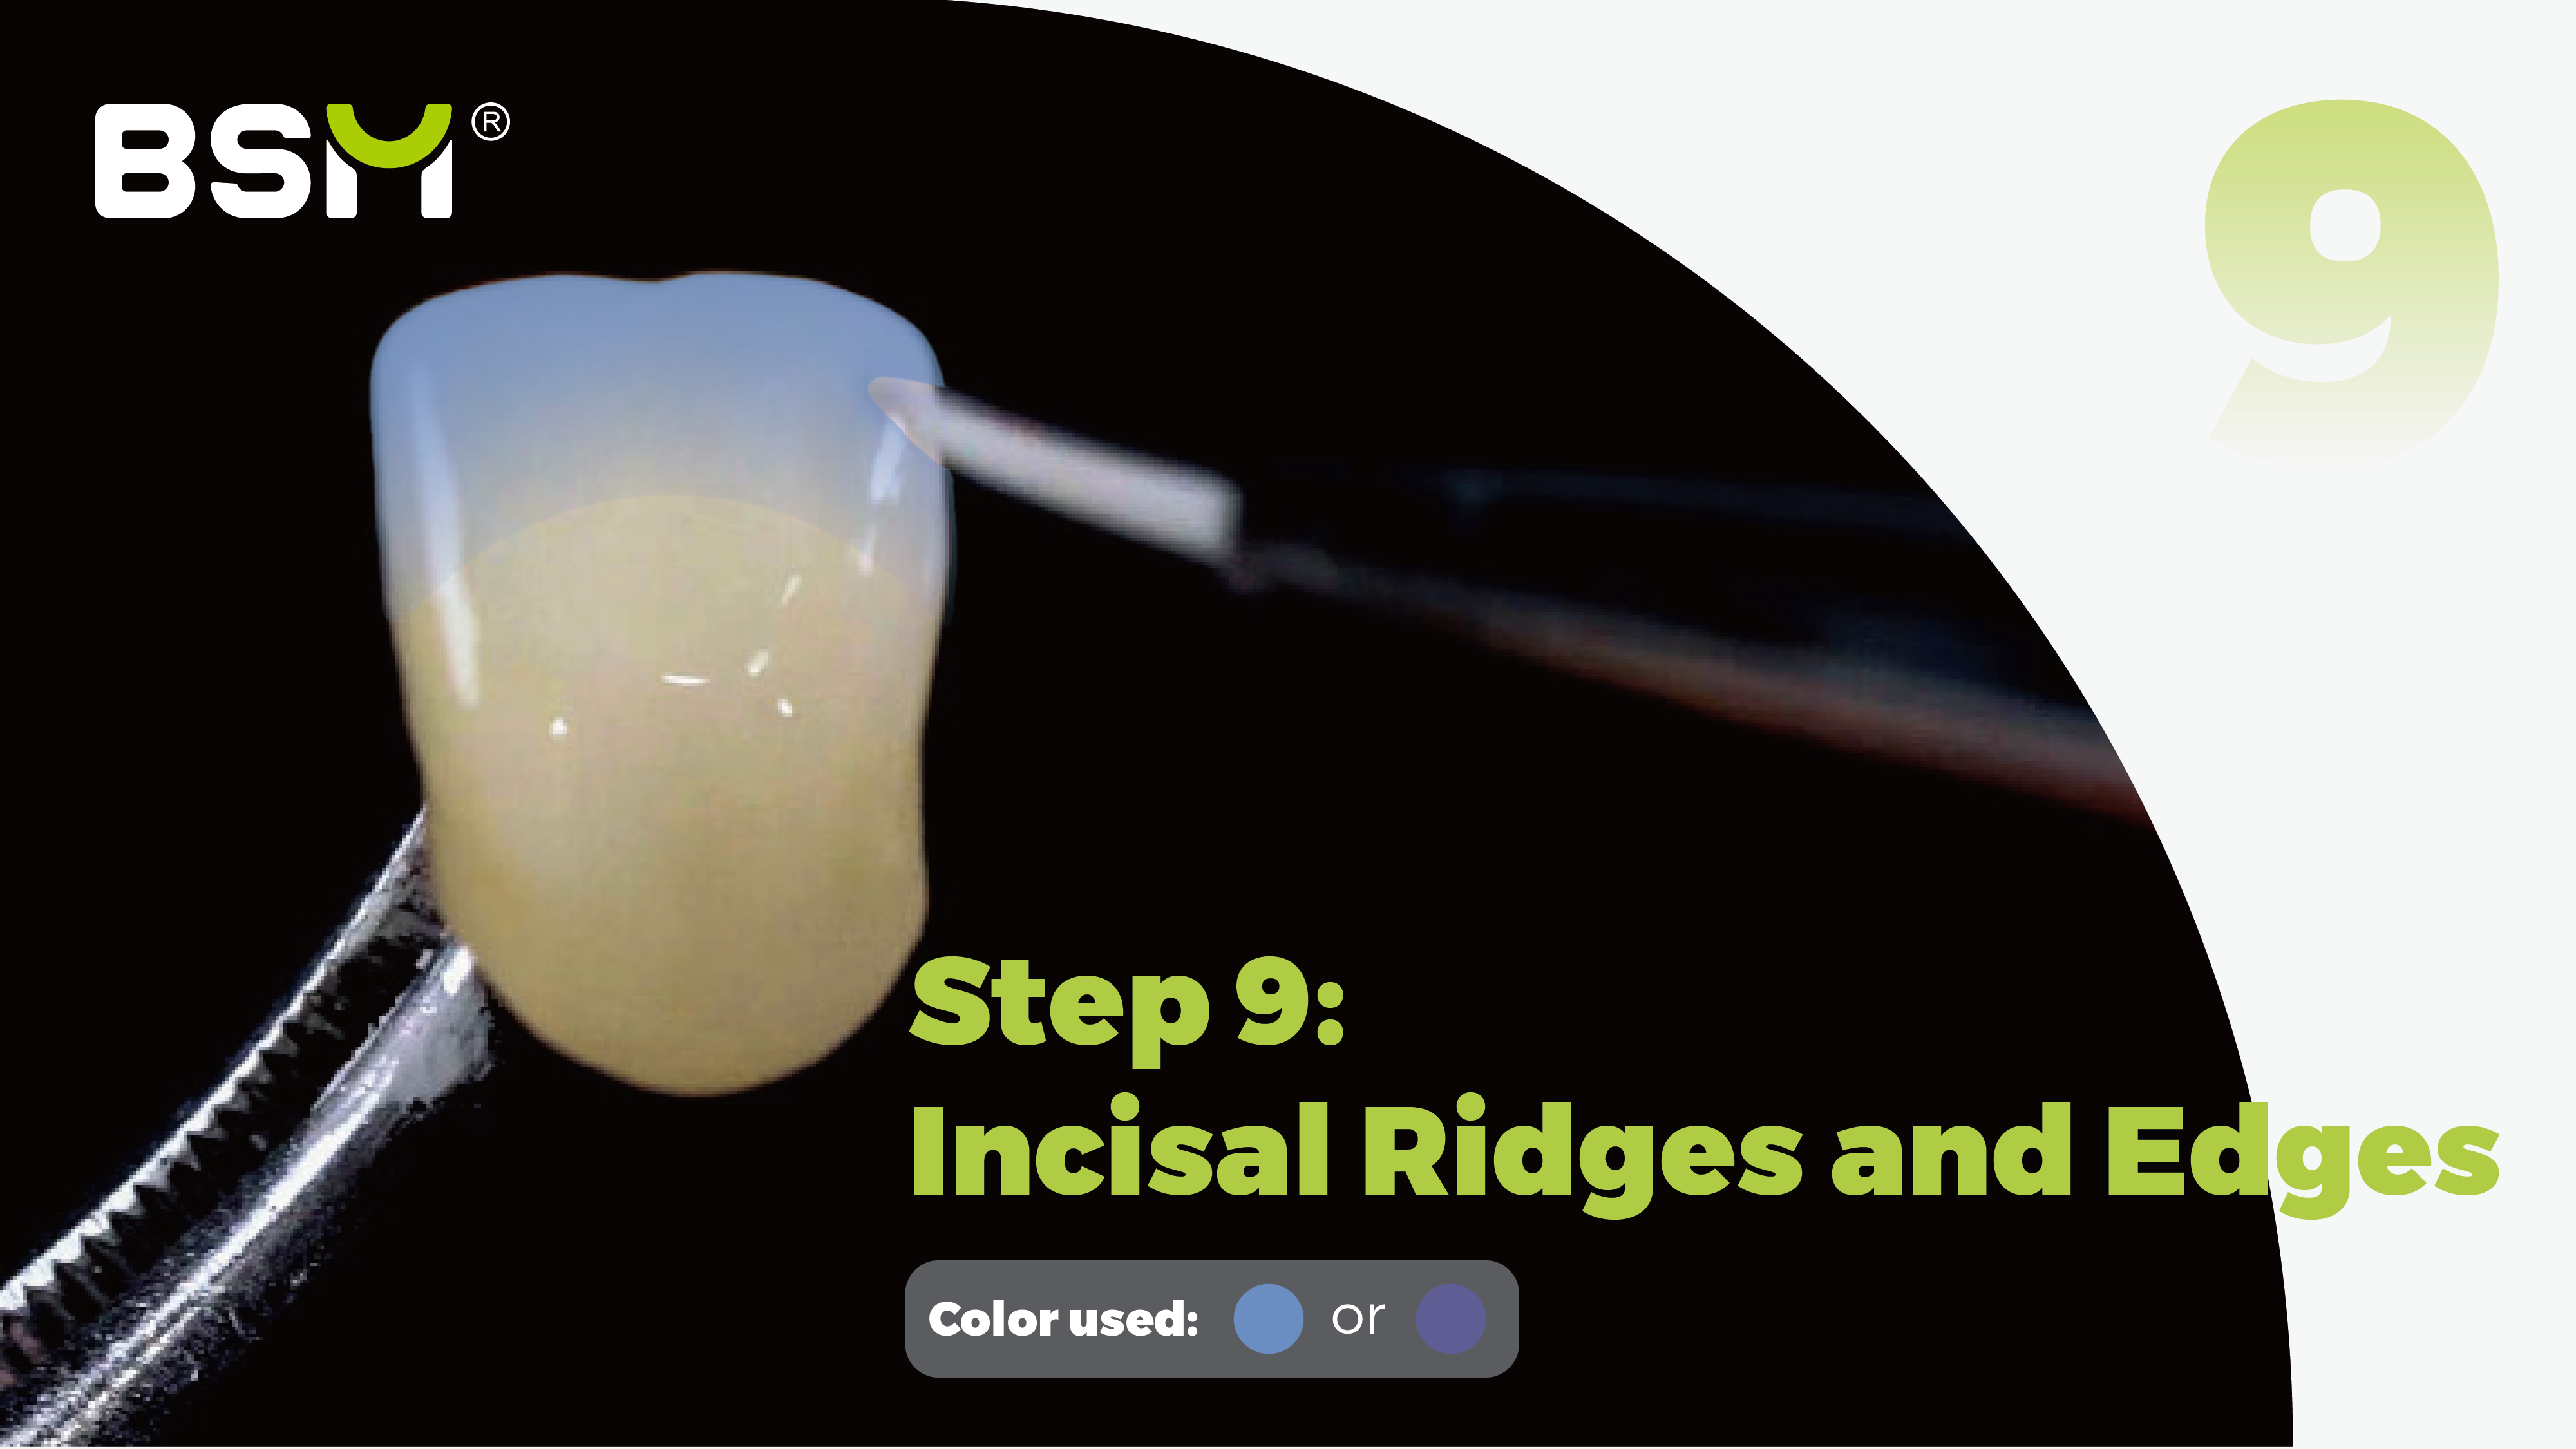
(9) Incisal Ridges and Edges
To add more depth and a translucent effect, use blue or purplish gray incisal shades to stain the incisal ridges and edges. This will give the restoration a lifelike shine and enhance the light-reflective properties, mimicking the natural enamel.
Color Used: Blue/Purplish Gray
Pro Tips: Before this step, it's necessary to fire and fix the previous color. The maximum temperature of the firing is 740℃ |
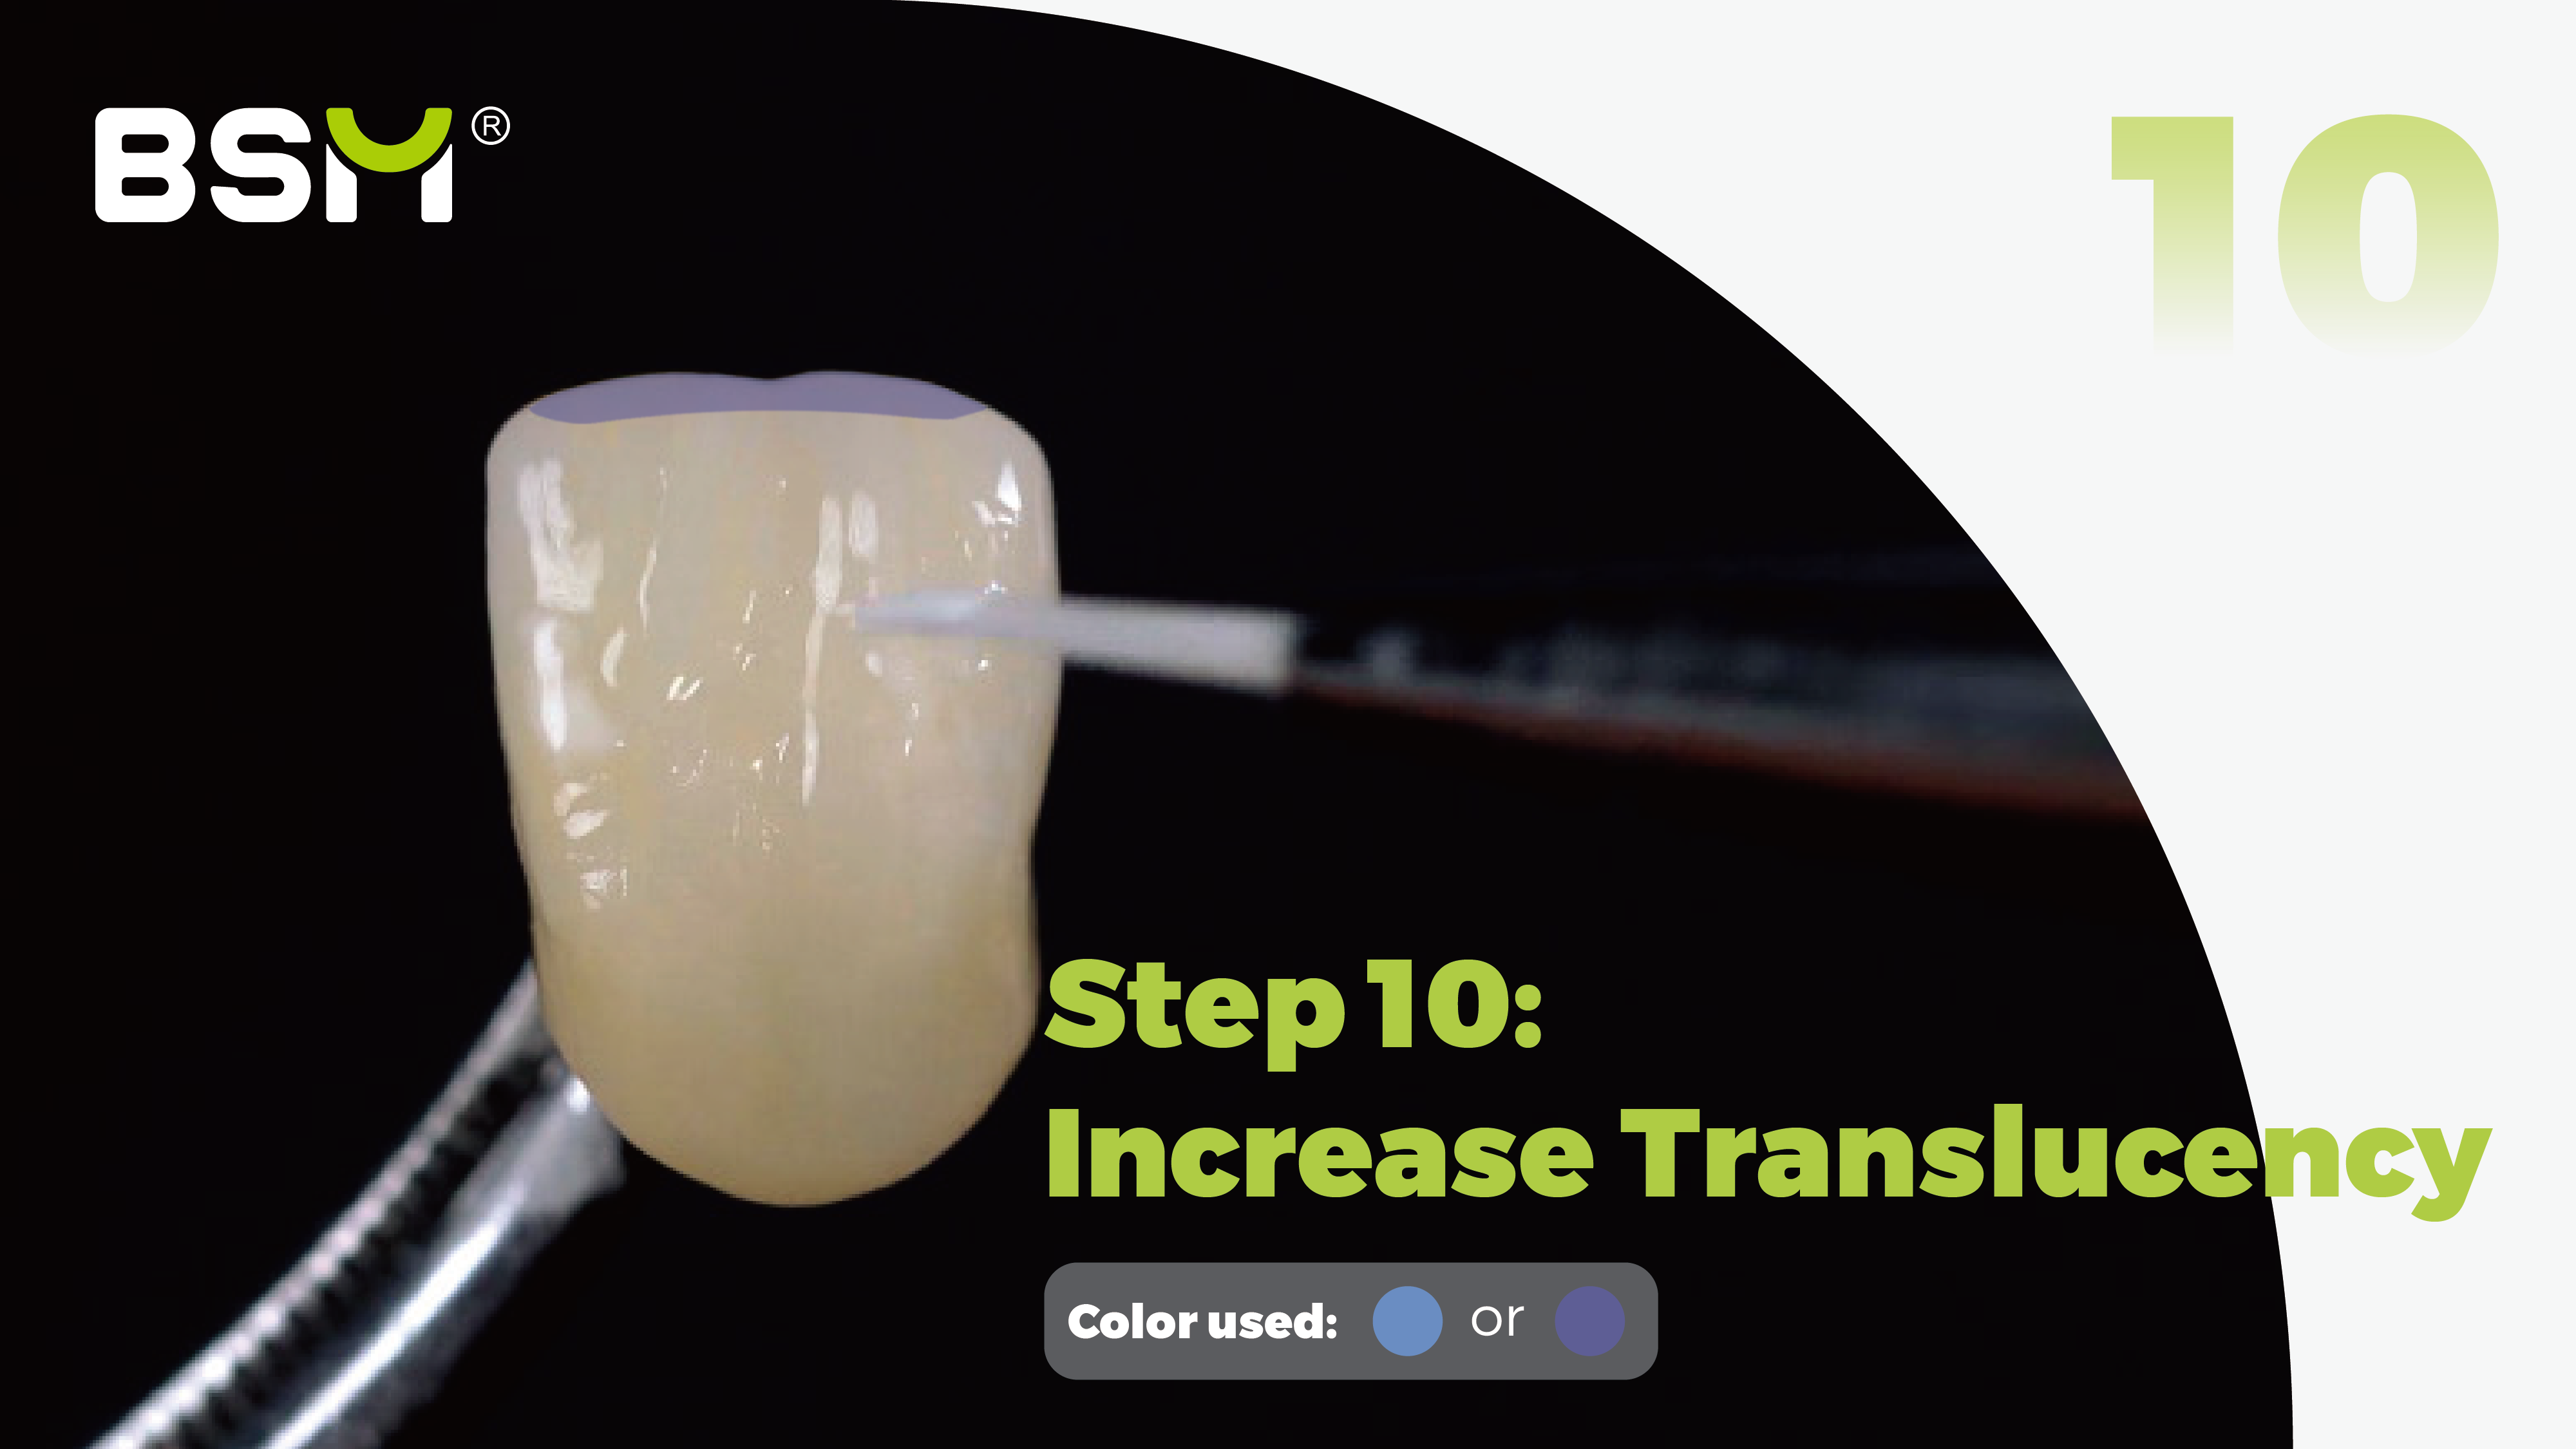
(10) Increase Translucency
For further refinement, use the purplish gray incisal shade to increase the translucent effects in the incisal area. This will mimic the porcelain layering technique and create a more realistic transition between the enamel and dentin.
Color Used: Purplish gray
Pro Tips: Extend about 1 millimeter from the edge towards the center. |
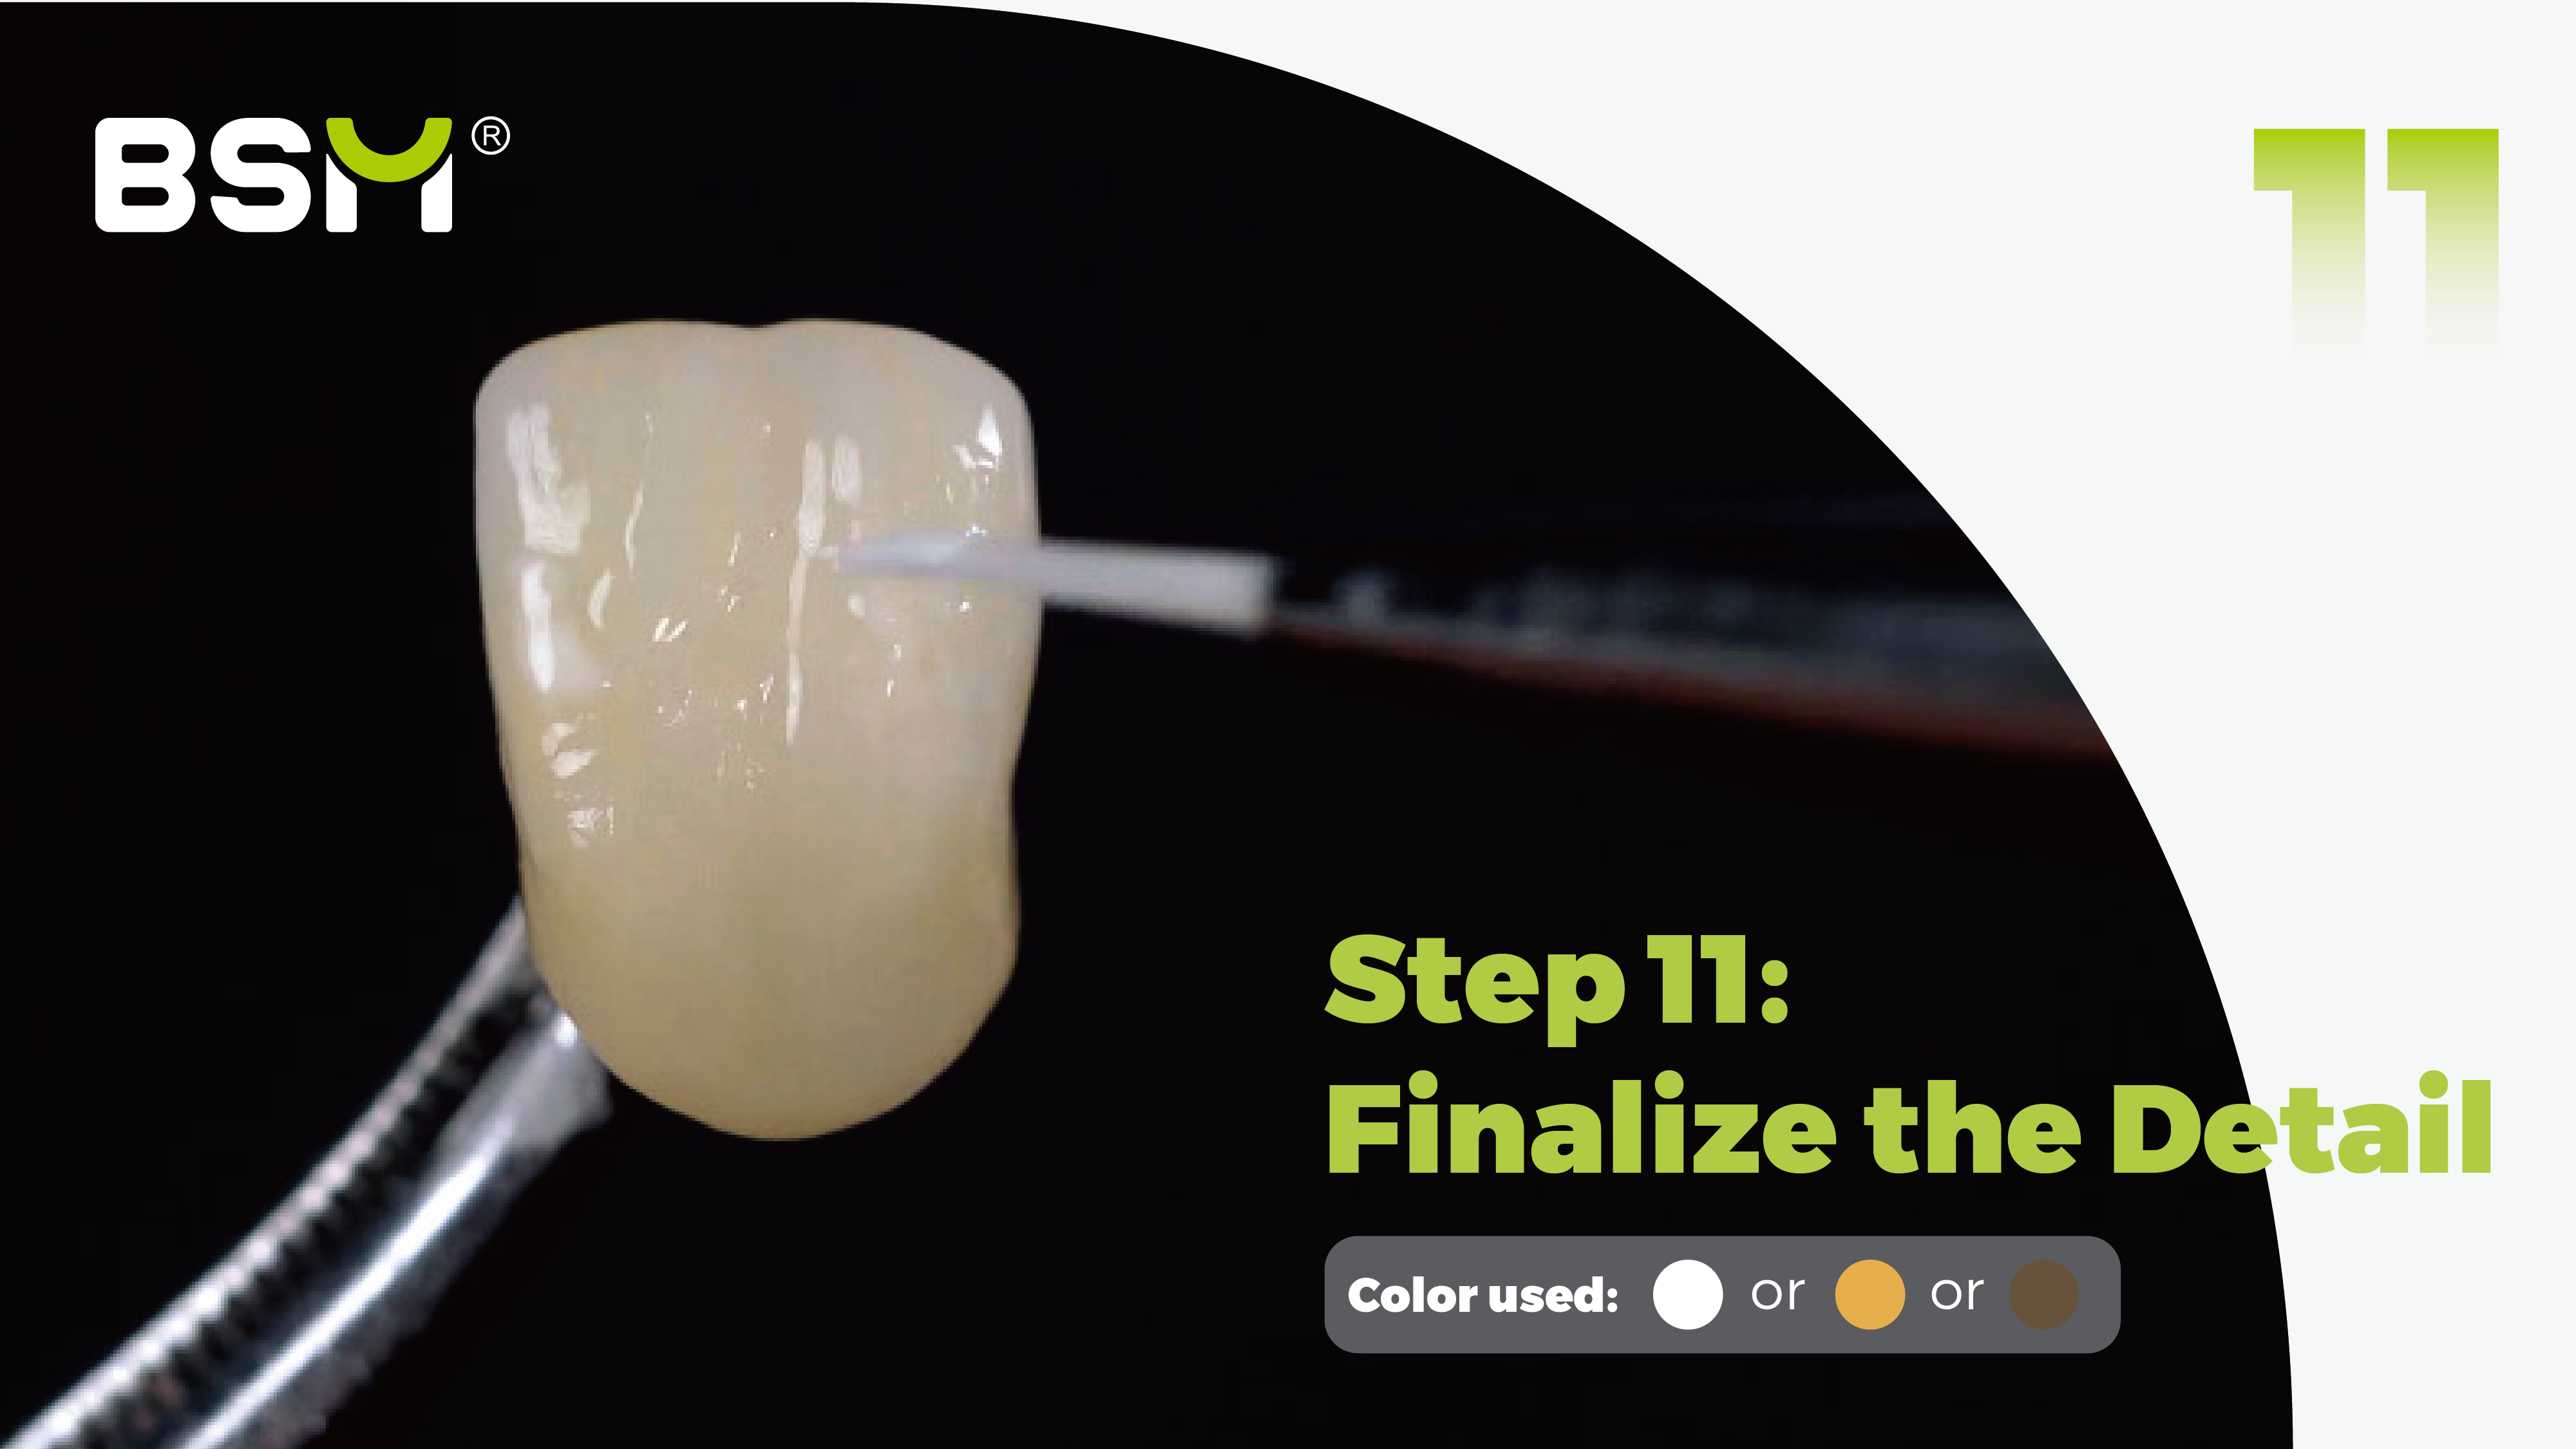
(11) Finalize the Detail
To perfect the restoration, apply additional adjustment shades such as white, orange, and brown to address any surface details, such as partial white spots, fissures, and pigmentation. These small details add authenticity to the restoration, making it look even more natural.
Color Used: White, Orange, Brown
Pro Tips: White for partial white spots ; Orange for pigmentation ; Brown for fissures. |
4. Firing (Final Cycle)
Once the final details are in place, bake the restoration again in the furnace. This ensures that all stains and glazes are fully fused and set, ready for use in the patient's mouth.
Pro Tips: The maximum temperature of the second firing is 10℃ lower than that of the first one, which is 730℃. |
Conclusion
By carefully following these steps, dental technicians can create anterior restorations that mimic the natural look of real teeth. From initial staining to the final glaze, each phase plays a critical role in achieving a lifelike result. Attention to detail and proper firing ensure that the restoration not only looks beautiful but also functions well, providing a seamless, natural smile for the patient.


